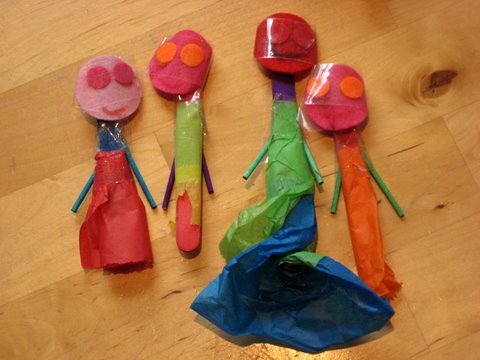
Need some ideas on how to re-use and re-cycle your wrapping paper? Try these ideas for tissue paper flowers, suncatchers, balloon puppets and wrapping paper dolls.
happily shared with Childhood 101
by Cathy James

Need some ideas on how to re-use and re-cycle your wrapping paper? Try these ideas for tissue paper flowers, suncatchers, balloon puppets and wrapping paper dolls.
happily shared with Childhood 101
by Cathy James
Did any of your Christmas presents come in a big cardboard box? Lucky you! Why not turn it into a play house or a story box?
by Cathy James
![]()
QUICK RESOURCE >> Download your ready-made Nativity Unit here
You can use this robin as a Christmas decoration or make a family of them to play with. It’s probably better suited to children aged 6 plus (my 4 year old hasn’t got the patience to make it, but my 7 year old loves them) and is a nice craft to do an a cold winter’s day as you sit on the sofa and chat.
You will need: card to make two rings, scissors, red yarn, brown yarn, glue, card to make eyes and a beak
1. Cut two circles from a piece of card. We made ours about 7cm in diameter.
2. Cut an inner circle in both the circles. The bigger you make this circle, the longer it will take you to complete your pompom. We made ours around 3 cm in diameter.
3. Start by making the red breast. Take 75cm lengths of yarn and wind them around the ring. Keep them close together, just where you want the red breast to be.
4. Use 75cm lengths of brown yarn to wind around the remaining section of the ring. Keep adding in lengths of yarn until your ring is full and there is no space left in the centre to thread any more yarn – but remember to just keep the red yarn to one section.
5. Use some scissors to cut around the outer edge of the ring, so the yarn fills out to create a ball.
6. Take another length of yarn and tie round, inside the two rings of card. Knot tightly to hold all the threads of yarn in place. If you’re making a decoration you can use the long lengths of yarn to hang it up, otherwise you can trim them.
7. Tear off the rings of card and fluff out your pompom.
8. Add eyes and a beak and you have a fluffy little robin.
Why not make some smaller ones to create a family?
Let’s make this winter the year when we delight in the cold and the dark.
Gather your children, get cosy, and make memories and connections together.
I’ll show you how with this guide to a cosy and connected winter:
…. CLICK HERE FOR YOUR GUIDE ….
![]()
by Cathy James
This craft was meant to be. We’ve wanted to have a go at spinning art for a while, so last week I went out to try and buy a salad spinner. As we were intending to get it covered in paint I didn’t want to spend a fortune on one but in any case fate intervened. As I walked passed a charity shop, guess what I spied on the shelf inside? One salad spinner! Sold.
Salad Spinner Painting.
You will need: a salad spinner, paper plates or circles of paper/card to fit in the spinner, runny paint, glitter is optional
You can use one big circle of card which fills the whole of the base of the spinner, or you can put several smaller circles of card in the base and put paint on each one. These smaller ones are good if you’re making gift tags.
1. Check if your salad spinner has drainage holes in the botton and if it does, sit it on a plate or tray to catch any paint.
2. Place your paper plate or circle of paper / card in the bottom of the salad spinner basket. It’s a good idea to hold it in place with a piece of Bluetac.
3. Put some blobs of the runny paint on the plate / paper / card.
4. Replace the lid of the spinner and get spinning.
5. Take off the lid to check your design. Do you want to spin again? Add some different colours? Sprinkle some glitter on while the paint is still wet?
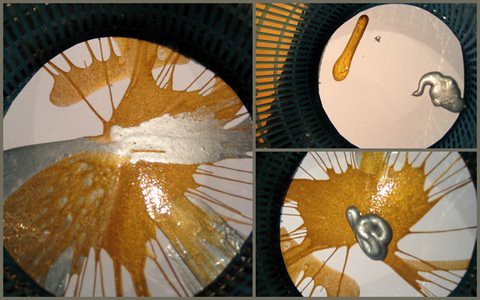
We’re going to use our designs to make Christmas decorations and gift tags, by punching a hole and adding some ribbon.
This spinning technique is also great for trying out colour mixing – add a blob of blue and yellow and spin to make shades of green.
You could make a fantastic mobile from your paper plates, or turn them into planets to make a space scene.
Have you tried salad spinner painting? How did you use your designs?
happily shared with Tot Tuesday and ABC and 123
by Cathy James
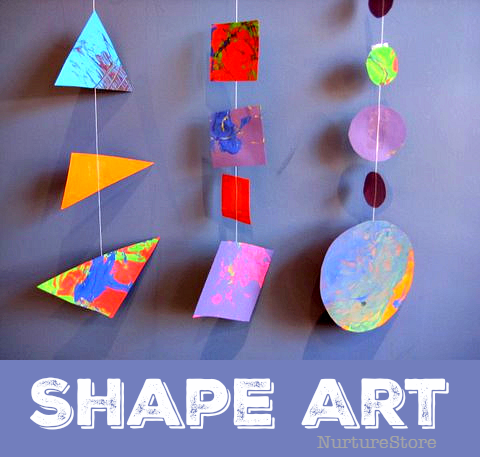
Did you see the marble painting we did yesterday? It was great roly-poly fun and we decided that instead of just adding to our picture gallery we would use the designs to make a shape garland.
We had lots of chat about which shapes we would use and decided to stick with circles, squares and triangles, as the children would find them fairly easy to cut out themselves.
We went on a shape hunt to find objects the right shape and size to draw round and then we cut them out.
We used our fingers to trace round the outside of the shapes and count how many sides they had.
We did some shape sorting, making piles of circles, triangles and squares.
We talked about size and lined each shape up from biggest to smallest.
Then we used sticky tape to fasten our shapes onto thread and hung up our garland to decorate our room. The mobile looks beautiful as it twirls around.
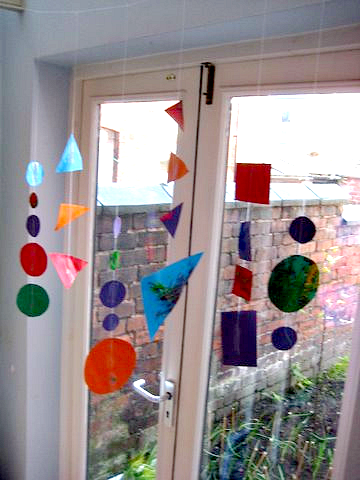
That’s a lot of fun learning from one simple activity. How do you teach shapes to your children?
by Cathy James
We love marble painting. We love the crazy patterns you can make, we love the roly-poly fun and we love how vibrant the final paintings are. Marble painting is a good craft activity to try with children who usually prefer action play to something artistic – you might just find that this rolling-action appeals, when normal painting or drawing doesn’t.
If you have a group of children you can try this on a grand scale: go outside and have the children sit around a huge piece of paper. Add some blobs of paint around the perimeter of the paper and give the children some marbles. They can roll the marbles to each other across the paper and make a collaborative design.
For a smaller scale version at home, we find a roasting tray is a good size to fit an A4 piece of paper, and of course the raised edges of the tin help to contain the marble. Add a blob of paint and practise your co-ordination as you tilt the tray to roll the marble through the paint. What patterns can you make if you add different colours of paint, or roll 2 or 3 marbles at once?
This is a fun, creative activity to try just for the pleasure of crafting but it creates wonderful pictures you can use to make into something else too: bookmarks, greetings cards and postcards, gift tags? Come back tomorrow and see how we transformed our marble paintings into a mathematical display.

