Here’s a simple spider craft for preschool that’s great for Halloween craft or nursery rhyme fun.

Here’s a simple spider craft for preschool that’s great for Halloween craft or nursery rhyme fun.
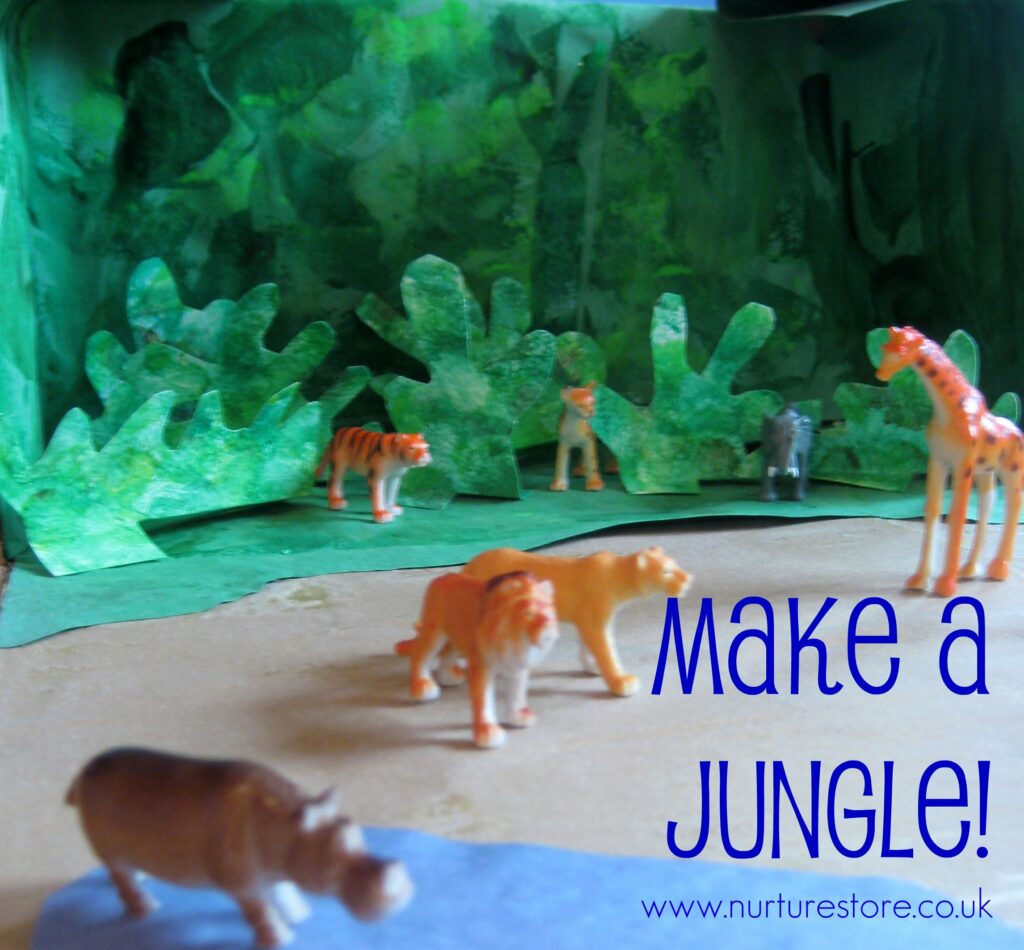
After the great pocket money debate, over the summer holiday the girls have started to earn a little money. A very exciting new thing for them, which meant on our recent trip to the zoo they had some of their own money to spend on a treat. So, we now have a family of wild animals in need of a home. On our return we transformed a humble cardboard box into not just a jungle, but a savanna and watering hole too. The hippo is very happy in her new home – and the play scene is giving the girls the chance for lots of imaginary play and chat.
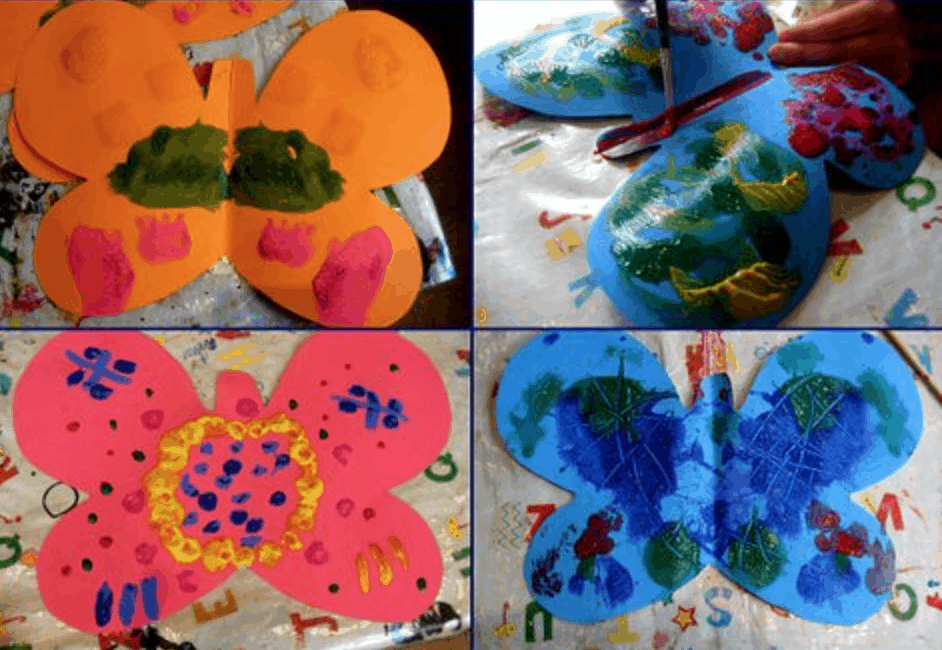
Following on from yesterday’s The Very Hungry Caterpillar craft ideas for caterpillars, today we have a selection of butterfly crafts.
The designs are all very simple again, making them easy for very young children to try.
Working with the idea of butterflies gives the opportunity to talk about symmetry and with older children you might want to encourage them to focus on creating matching patterns, as part of a more mathematical activity.
With young children though I think the main purpose behind these crafts is to invite them to enjoy the colours and see what patterns they can make – so I wouldn’t worry about strict directions about making sure both sides match.
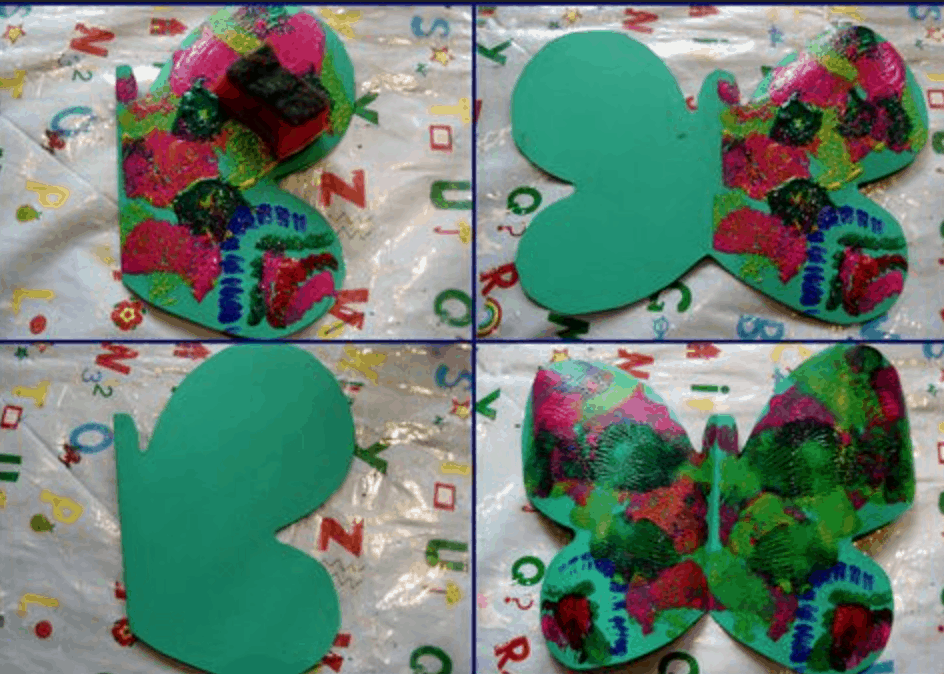
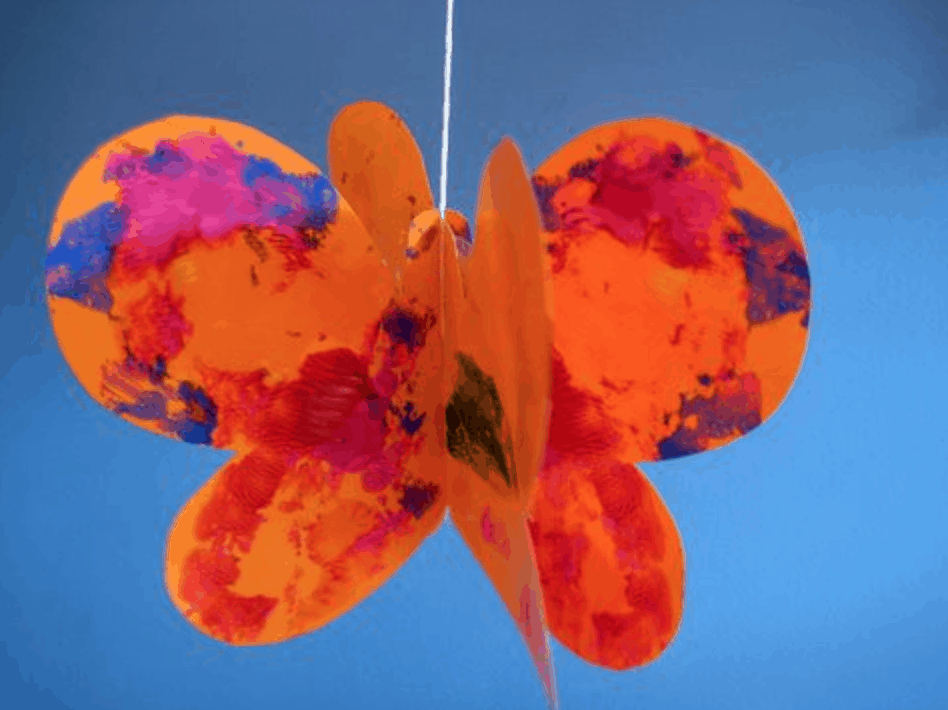
This idea is a childhood classic – painting on one side of a piece of paper, folding and squishing the paint, and then opening it up to reveal your butterfly.
I particularly love this technique because it’s open to all children – even babies. Everyone can join in: finger painting, smearing colour around, making hand prints, using brushes or sponges to apply the paint. And my kids really love the surprise reveal when the final pattern is peeled open and revealed.
Two tips I’d share:
1. It might be hard for the children to understand the idea of painting at first on one side of the paper only, and you won’t want to pester them all through the activity to stop painting on the other side. If you fold the paper over so the side to be kept clear is underneath and only the side that needs painting is presented to them (see above), then they can go for it, applying the paint wherever they like, without any restrictions. When they’ve finished you can fold it the other way to make your print.
2. I’d do a demonstration of the folding and squishing first before using their own art work – some children can be very upset if they think you’re spoiling their design, so best for them to be happy with the plan before you try it.
These twirling butterflies were inspired by an idea Amanda created for Make and Takes. Amanda’s children made ladybirds, but I think they’re also beautiful with a butterfly design, and the kids can paint, pattern or collage any design they choose.
Make and Takes has a step-by-step guide to assembling them.
A tip I’d add: if you laminate the pieces of card before assembling them they’ll withstand a little rain so you can have them twirling in the garden.
We used a wooden clothes peg to make a butterfly mobile: here’s our step-by-step guide showing how we made it.
After big sister’s guide on how to make a dinosaur world yesterday, today little sister is taking over the blogging reigns with her design for how to make a junk model snake.
To make a snake like L’s you will need: toilet roll tubes, scissors, paint, a long ribbon, stapler
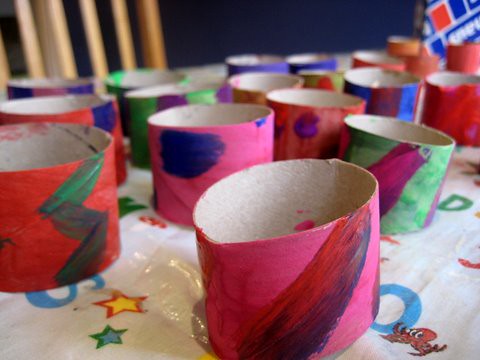
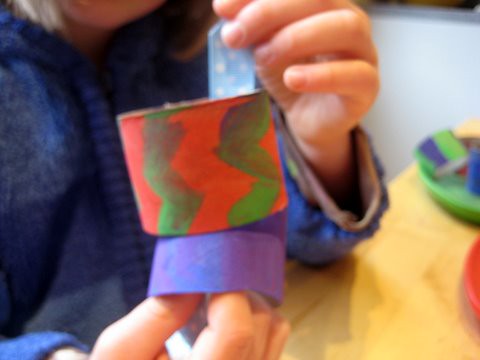
Start by cutting each toilet roll tube into three. Paint them in your favourite colours adding extra stripes and spots to make them fancy. Mix some colours together to try out some new shades too. Our favourite was purple.
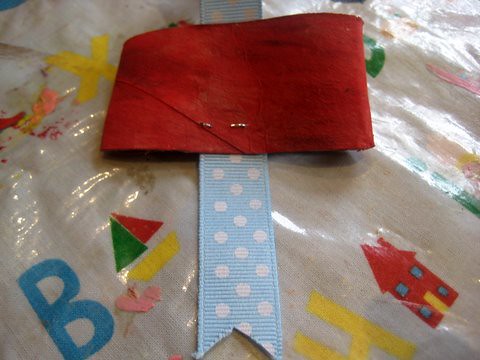
Once the paint is dry, choose one hoop to be your snake’s head. Thread the ribbon through and staple it in place. Cut the end of the ribbon to make it look like a snake’s tongue.
Thread all the other hoops on to the ribbon to make your long snake.
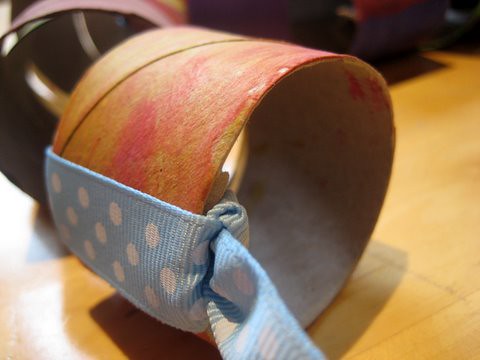
To fasten the last one in place and stop your snake falling to pieces, loop the ribbon round the last hoop and fasten it with a knot.
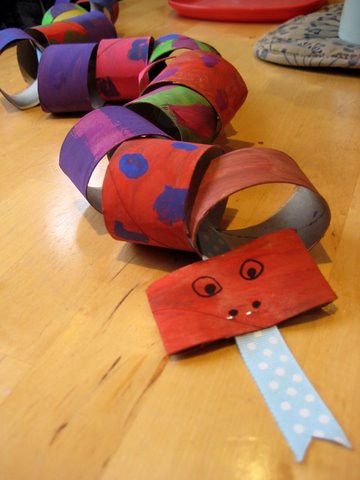
Add some nostrils and some eyes and your snake is ready to go a-slithering.
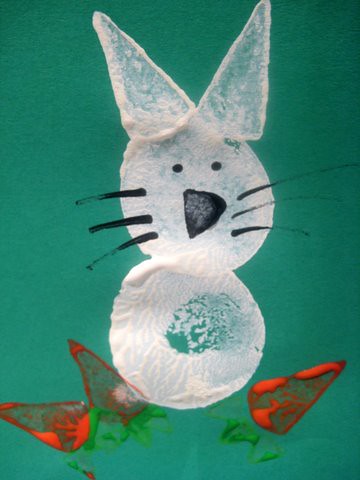
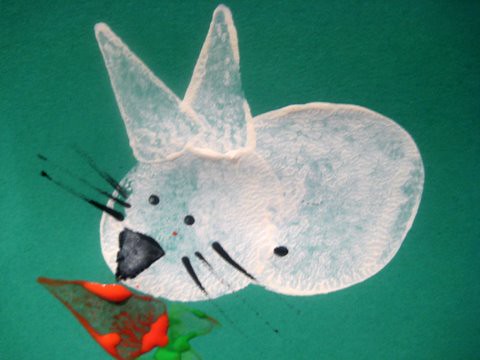
Are you celebrating the Chinese new year next week? I like to observe celebrations from around the world with the children as I think it open their eyes to diverse cultures, showing them how people around the world are different but how the basis of many traditions are very similar too. We like to make Chinese style lanterns (which are perfect for practising scissors skills) and eating a Chinese meal. This year, which begins on 3rd February 2011, will be the year of the rabbit so here’s an idea for a craft you could try:
Potato Printing a Rabbit
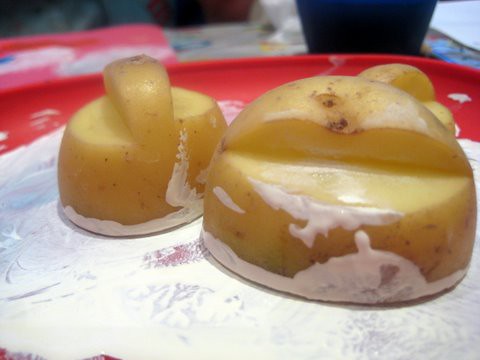
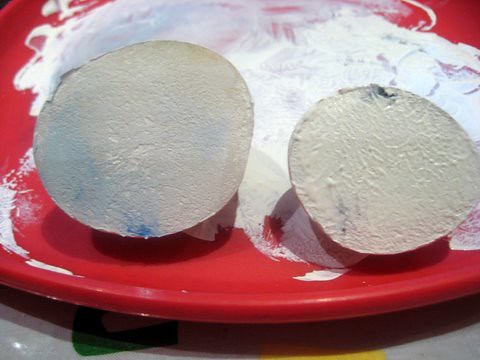
We used potatoes and carrots to print with to make our rabbit. (Seems appropriate to use carrots, don’t you think?) Carrot printing is great for younger children as the carrots are just right for holding in little hands. Potatoes are a little more cumbersome to hold but you can make easier for the children to grasp if you cut out a handle into the top – as shown in the picture.
This rabbit design provides the opportunity to mix in some maths, as we thought about what shapes we could use to make our pictures. We decided to make a picture using just two shapes: circles and triangles.
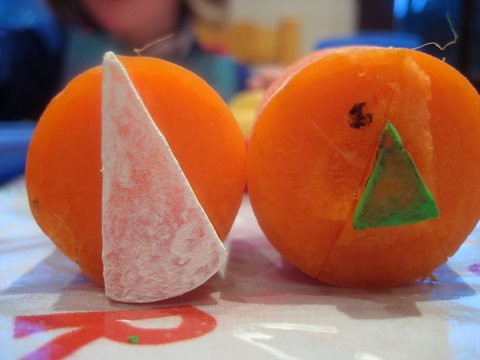
I used a knife to cut out a triangle from the carrots, the potatoes were simply sliced in half.
We also talked about size as we used a big shape to make the body, ears and carrots and a small shape for the head, nose and carrot leaves.
We enjoyed having a specific project – working out how to form our rabbits and follow our instructions to create the pictures – but it was great to add in time at for some free style printing too, to see what other designs we could come up with using the circles and triangles.
Raise a global child! Exploring festivals from different countries and cultures is a wonderful way to learn about the world. You can see our archive of Chinese New Year activities here.
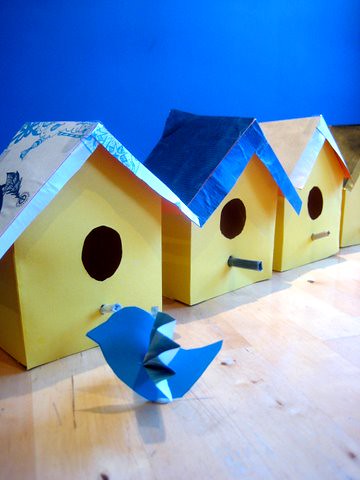
 Valerie over at the Frugal Family Fun Blog has such great ideas and we love the crafts she does with her two girls. When we saw her post about a printable bird house play set we thought they were so cute we’d have to try and make some. The houses can be made from card, or even a recycled cereal box, and Valerie has given us all a template to use which means they are so easy to make.
B, who’s seven, managed to do all the stages by herself: tracing round the template, cutting, folding and sticking and she is really pleased with her birdhouse. She decided to leave the roof un-stuck so she could put some furniture inside and use it as a play house. The house was a little too tricky for L, who is four, to make by herself but she got involved drawing a pattern which we used to make the roof, and she’s really enjoying all the small world play now the houses are finished. We made some extra houses to hang in the window as decorations too and for these we stuck the roofs down. I think the co-ordinating roofs and perches make this a very stylish neighbourhood! We used recycled wrapping paper to make them but they’d be the perfect way to re-use your children’s art work too.

Of course then we decided we needed someone to come and live in our bird street so we made a little flock of birds. If you’d like to make some the same as ours you can use this Printable bird template, which works out a great size to match with Valerie’s bird house. All you need to do is draw round the bird template on card, adding a slit where you can insert the wings. The wings are made from a piece of paper folded into a concertina and pushed through the slot in the bird’s body. You can make a hole above the wings if you want to hang them up on a cotton thread, or add a base so they can stand up if you’d like to play with them. You’ll find both options available on the template.
We used the same paper for the birds wings as we did the roofs of the houses, so it turned out to be a good matching game too, making sure all the birds got back to their own house. A big thank you to Valerie for the idea and the how-to bird house template. If you don’t already know the Frugal Family Fun Blog do pop by for a visit as I know you will love her ideas.
happily shared with Kids Get Crafty, Upcycled Awesome and Works for me Wednesday and Preschool Corner and Craft Schooling Sunday and No Time For Flashcards and Making Mondays Marvellous and and Mad Skills and Mad Skills Monday and Made by You Monday and Homemaker Monday and Sumo’s Sweet Stuff and Today’s Creative Blog and ABC and 123 and Something for the Weekend