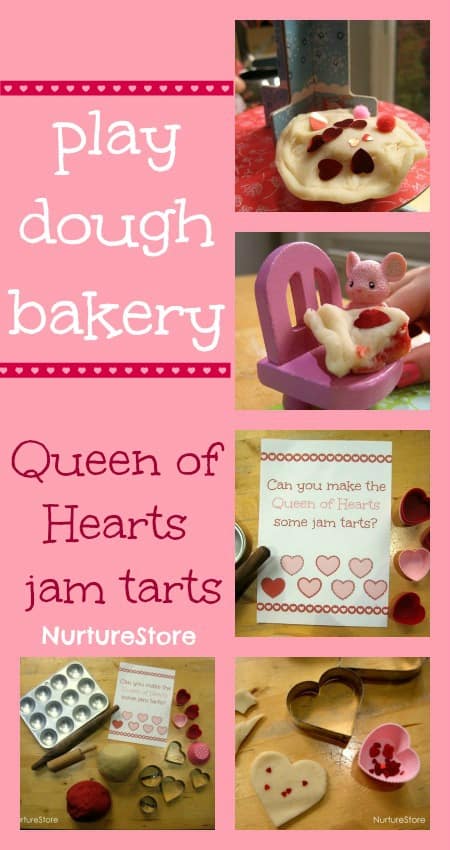
We took our favourite play dough recipe and transformed it into some fun messy play, making jam tarts for the Queen of Hearts in our Valentine bakery.
by Cathy James
We took our favourite play dough recipe and transformed it into some fun messy play, making jam tarts for the Queen of Hearts in our Valentine bakery.

by Cathy James
Here’s one of our favourite Valentine crafts: a Valentine gratitude tree.
I think you can make Valentine’s Day more meaningful for children if you move away from a focus on romantic love and instead think about what you’re grateful for. Ask your children what they love or who they love and you might find their answers surprising. You can capture their passions with this Valentine Gratitude Tree idea. [Read more…]
by Cathy James

Include your baby in the Valentine’s Day celebrations with this easy to make Valentine’s mobile. (Even better if you have an older brother or sister around who can help with the cutting and sticking).
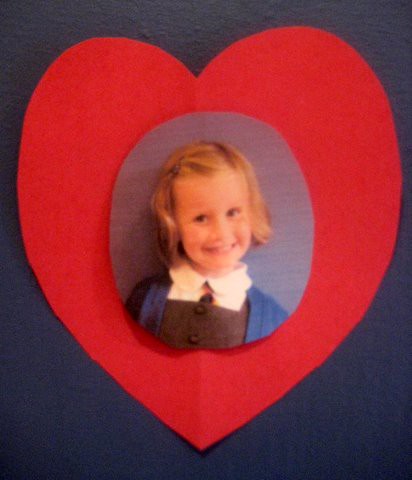
Babies love looking at faces, especially ones they recognise as being special to them. Mobiles are a great way to help your baby develop their focus and track objects, and they can help keep them entertained when you’re changing their nappy or when they’re having some tummy time.
Here’s how to make it:
Look at these step by step drawings for more details
1. Cut out some hearts from red card – around eight is a good number to fit the mobile.
2.Print some photos of the people your baby loves: parents, siblings, grandparents and even pets. Cut out the faces and stick one in the centre of each heart. You might like to put a face on each side so there’s someone to look at whichever way the mobile turns.
3. To make the mobile, cut out a hoop from a piece of thick card, about the size of a large dinner plate and with a width of about 5cm.
4. Make four holes at even spaces around the hoop and thread through some string, wool or ribbon. Tie the four threads together and use this to hang your mobile.
5. Add threads to each of your hearts and fasten them to the hoop. An easy way to do this is with a sewing needle and some cotton. Thread the cotton through the needle and knot one end. Push the needle through the heart, then push it through the hoop. Leave a long thread so the heart dangles down and tie a knot at the other end to hold it in place. Place your hearts at even spaces around the hoop to help your mobile balance and hang well.
6. To make a simpler version you can hang the hearts from a ‘washing line’. Fasten a length of ribbon or thread between two nails and tie or peg the hearts along the line.
7. Hang your mobile or washing line where your baby can see it and the faces on the hearts are visible, but just out of their reach so there is no chance of them getting tangled up. You might find it better placed slightly to the side over their nappy changing table, as babies most often lie with their head turned a little.
We have more Valentine’s crafts in our archive including a Valentine shaker, just right for musical babies.
**********************************************
Our SUPERbaby play series focuses on simple, playful ideas you can use with the youngest of children to have fun and encourage them to develop important early learning skills. The emphasis is on ideas you can easily fit into a busy week, using materials you’ll have around your home. View all our SUPERbaby ideas here.
happily shared with Works for Me Wednesday and Craft Schooling Sunday and the Virtual Valentine’s Day Party
by Cathy James
I was looking for inspiration yesterday as I had some Love Heart sweets for my girls and was wondering how to use them as a Valentine gift. I had some great suggestions from friends on my Facebook page and on Twitter. I knew my girls would definintely want to eat the sweets, so rather than stick them onto anything I decided to make some Valentine baskets to put them in. This idea reminded me of a bag I’d made as a child. Here’s my interpretation. I hope you like it – and hope my girls do too.
You will need: two circles of red card, some tissue paper, scissors, ribbon, stapler, something to decorate you heart: I used a decorative hole puncher and some heart stickers
Step One: Decorate the two card circles on one side only. This gives your child an opportunity to be creative and use their own ideas.
Step Two: Fold each circle in half.
Step Three: Fit the folded circles together to form a heart shape. Staple the two together – one staple at the base and one staple on each side at the top where the circles intersect.
Step Four: Add a ribbon handle (stapled on) and some tissuepaper inside. (A little glue or stickytape helps the tissuepaper stay inside the bag)
Pop some goodies inside and the basket is ready to give to the one you love.
I’ve also make these lollypop flowers inspired by a lovely idea over at The Mad House.
Happy Valentine’s Day to you!
happily shared with the Virtual Valentine’s Day Party
by Cathy James
This is a very simple idea to include even the youngest child in the Valentine fun.
When I saw this heart shaped ‘Love Pasta’ I knew I had to have some! (Guess what we’re having for dinner on 14th?) And I’d also been thinking about how to include a baby I know in the Valentine celebrations as she’s too young for any chocolate treats or to get involved in the other crafts we’re doing. One thing she is fantastic at however is making noise! She’s really enjoying finding her own voice and also trying out what sounds she can make by banging toys around, which gave me the idea of making her a musical shaker with a sprinkle of hearts inside.
It’s pretty much the easiest thing to make:
Take a clean, empty drinks bottle.
Fill with something to make noise when baby shakes it. I used the Love Pasta, but you could use dry kidney or borlotti beans (which keeps with the colour scheme) or rice or whatever else you might have in your storecupboard.
Add something to catch baby’s eye. I used some heart shaped foil confetti and some swirls of red shiny ribbon.
Fix the lid on tightly. I applied superglue around the rim of the bottle and them screwed the lid on top. I added a ribbon around the neck of the bottle, but if you’re concerned about baby chewing this you can leave it off.
Hand the bottle over to baby and let them shake away to their hearts content.
This post is happily shared with the Virtual Valentine’s Day Party
by Cathy James
February 14th is nearly here so we’re starting on our Valentine crafts with this carrot printing picture. It’s a simple craft for young children to try out, so long as they’re old enough to understand that this carrot isn’t to go in their mouth. You may have tried potato printing before but I find carrots are easier for little hands to grip.
You will need: a paper plate, some red and pink paint, a plate to put the paint on, a carrot, a craft knife or a kitchen knife with a sharp point, a ribbon and some sticky tape.
Cut the carrot in half and etch out a heart shape. A grown-up needs to do this part of course, but it’s fairly easy – I managed it! We did a small heart on one piece of carrot and a big heart on the other but you could do a cross shape for a kiss too.
If you level off the other end of the carrot you’ll be able to stand it upright when you’re not using it.
Put some paint on your plate and dip your carrots in.
Print out your hearts on to the paper plate.
Keep going using the red and pink paints until your artwork is complete.
Add a ribbon on to the back using sticky tape and hang your decoration for all to admire – or give as a present to the one you love.
Did you see all my other Valentine’s Day activities for children? I’ve got more free printables, art, math, science, literacy and play ideas, all with a Valentine theme. You can find them all here.

