Let’s learn about leaf symmetry in this STEAM lesson that combines math and art.
Leaf symmetry lesson combining math and art
This activity combines math, art, and nature study, as we explore the symmetry of leaves.
It includes an extension activity at the end, looking at radial symmetry in apples.

Ready-made forest school lesson plans
Have you got your copy of The Forest Classroom yet? It is the perfect beginner’s guide to running a successful forest school. Download your forest school guide here.
A forest classroom is a place of adventure, discovery, and imagination. It can also be a wonderful place to learn about math and science, explore art and crafts, and develop language and social skills.
The Forest Classroom is a practical guide which will show you how to engage your children in fun and educational forest-school activities.
These ready-made forest school lesson plans are suitable for forest school leaders, teachers, childcarers and parents with children aged 4 to 10, to learn in a forest, school nature area, local park or your own backyard.
Get your copy of The Forest Classroom here and you’ll be ready to head straight outdoors and enjoy teaching, using our ready-made lesson plans.

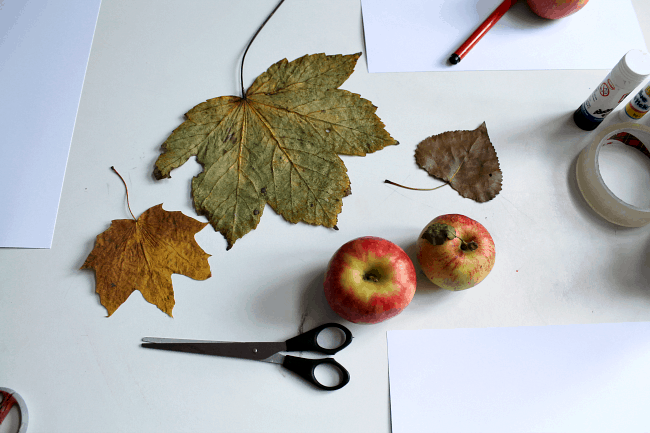
Materials needed
:: leaves
:: nature journal or paper
:: pencils
:: eraser
:: scissors
:: sticky tape
:: apples and knife (optional)
What is symmetry?
Symmetry is a similarity or balance between different parts of something. People, animals, and plants can be symmetrical in some ways.
Think about your body. Imagine drawing a line from the top of your head all the way down to the floor.
Then think about what your body looks like on either side of that line.
One side is more or less the exact same as the other: an arm on each side, a leg on each side, matching ears, matching eyes.
Your body is symmetrical.
Then think of the face of a cat, and imagine a line from the top middle of the cat’s head running down to its chin.
Can you see symmetry here too?
The cat’s face is balanced on each side of that line: two ears, two eyes, two nostrils, two sets of whiskers.
It’s symmetrical.
Exploring leaf symmetry
We can see lots of symmetry in nature.
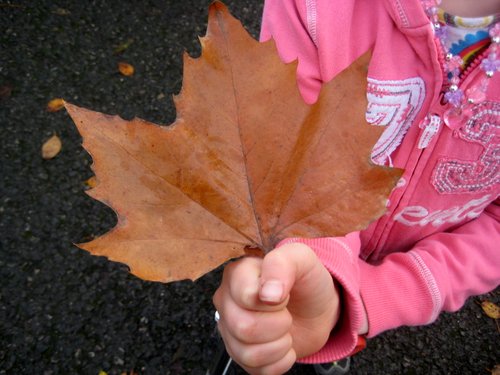
Have a look at your leaves. Are they symmetrical?
Draw, or imagine, a line from the stem of one of your leaves, all the way along the leaf to its tip. Are the two sides of the leaf balanced?
Have a look at some of your other leaves: different sized ones, and those from different types of tree. Are they symmetrical too?
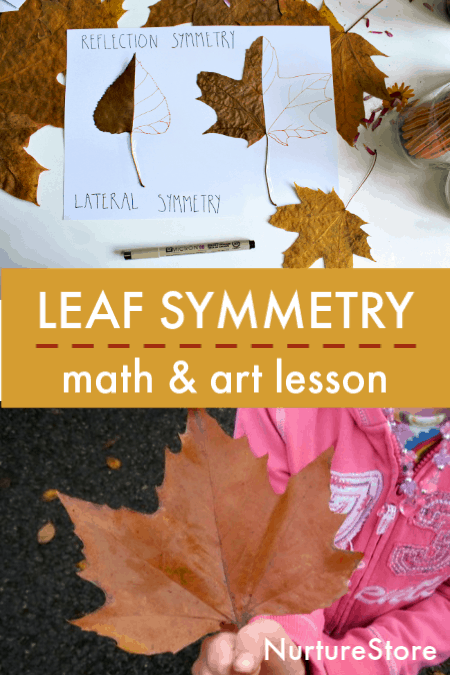
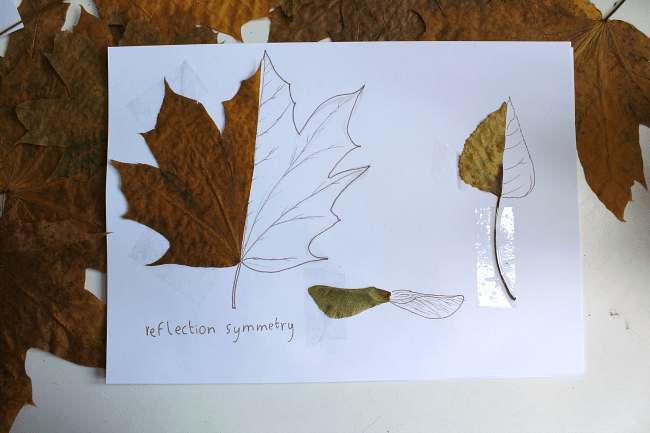
The type of symmetry you can see in your leaves is called lateral symmetry, or reflection symmetry. It’s when you have two exact parts, like a mirror image.
Let’s try and draw some symmetry!
Drawing leaf symmetry
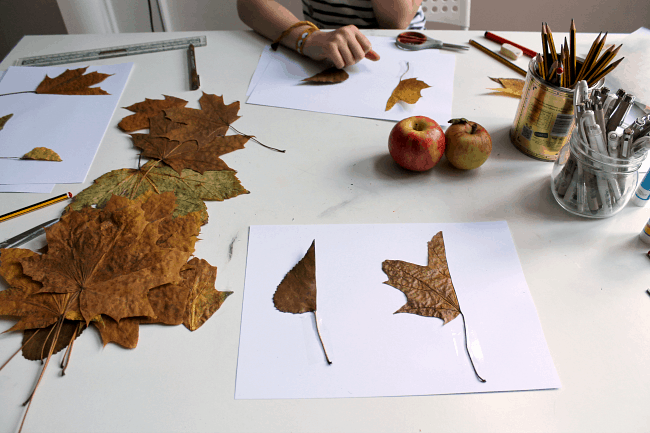
Use your scissors to cut along the central line of a leaf: from stem to tip.
Then stick your half-leaf down in your nature journal or on your sheet of paper.

Can you complete the other half?
Take your time, and look very carefully at the shape of your leaf. See if you can follow the lines and bumps exactly on your half.
You might like to use a pencil, so you can rub out any wobbles!
Try and get your drawn-half as close to the real thing as possible.
You can add veins too, if you like.
If you want to check how accurate you have been, place your cut leaf half over the top of your drawing and see how they match up.
Extension: radial symmetry
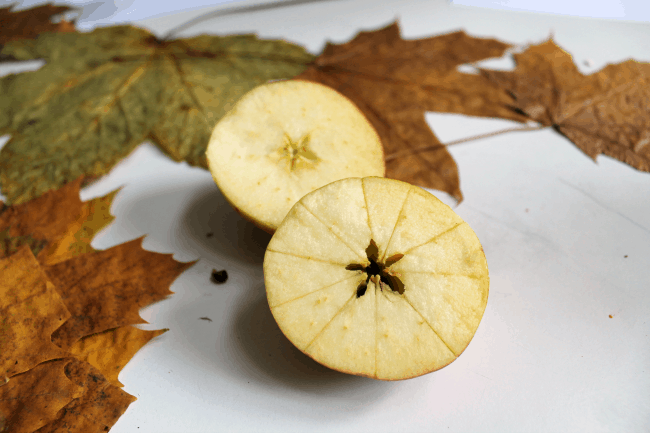
In addition to using leaves to look at lateral symmetry, you can also use apples to explore radial symmetry.
Radial symmetry is symmetry around a central axis.
To look at this in an apple, cut one in half across-ways (not from stalk to calyx).
Take a look at the ‘star’ in the centre. Can you see how the five points of the star radiate out from the centre of the apple. Imagine rotating the apple star around: it would match its position at each turn.
Notice how each point of the star is about the same distance from the next point. You could measure the angles with a protractor and see how many degrees apart they are.
Introduce the idea that a circle – like your apple – is measured out into 360 degrees. With five points to our apple star, we’d expect each point to be around 72° from the next. (360 ° divided by 5).
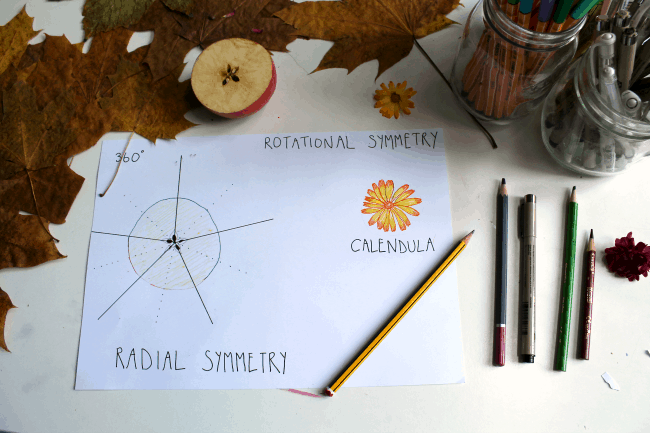
Draw your apple half in your nature journal and add in the lines of radial symmetry.

Download your complete Autumn Teaching Kit
This tree lesson plan is part of our complete Autumn Teaching Kit. The kit gives you everything you need to teach a whole curriculum based around apples, pumpkins, leaves and twigs.
With 75 engaging activities and 50 pages of printables to make teaching so easy, it’s the go-to resources for autumn.
Click here to see more and download your Autumn Teaching Kit.