

Please welcome Erin from The Usual Mayhem who joins us today sharing this super idea for making multi-sensory Montessori-style sandpaper number.
How to make your own Montessori-style sandpaper numbers

Magic Fun Math lessons!
Fun Math is an easy to teach, highly effective math curriculum based on play and hands-on learning.
All the lessons are designed to be fun and memorable, so children enjoy their lessons and feel confident.
The lessons are easy for teachers and parents to use, in class or at home.
These are the magic lessons where children really see, understand, and can apply math concepts. They are especially suited to children who don’t like math, lack confidence, don’t understand math the way they are currently being taught, or just want to play.
SEE MORE AND TRANSFORM YOUR MATH TEACHING HERE.
Thanks for having me here as a guest poster!
Today I’ll show you how to make your own sandpaper numbers (and letters). Readers of my blog, The Usual Mayhem, will know that we use a combination of Waldorf and Charlotte Mason education in our homeschool. What you may not know is that I worked in a Montessori school, attended a Montessori school myself, took the teacher training, and it is my preferred method of education for the youngest ages.
Using sandpaper numbers is a great tactile way to introduce the proper form before your children attempt to draw them. I can still ‘feel’ the shapes as I traced them in my own early years! Buying sandpaper number cards can get really expensive, though, so here’s how you can make your own very easily (and as a bonus, you’ll sharpen your kitchen scissors!)
You’ll need:
- fine grit sandpaper (mine is Step 2, or 180 grit)
- printable blank labels. Size is a personal decision. If you’re using them to introduce numbers for the first time, I would suggest labels that are 1/4 to 1/2 of a 8.5″ x 11″ sheet. I used 2″ x 4″ labels (“name badge” sized), and I’ll share how I used them later in the post. My instructions sound complicated, but they are dead easy and only take about a minute each not counting cutting out your numbers
- access to the internet and a printer
- scissors
- cardstock or pieces of thin plywood for your base, if you plan to use them as the traditional cards
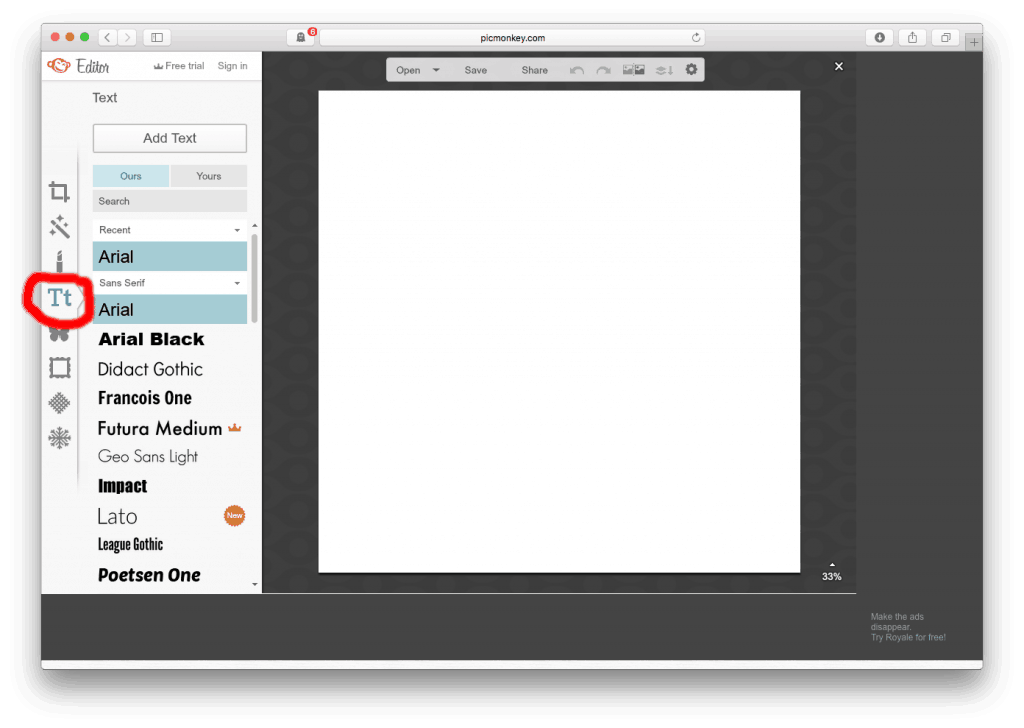
Step 1. Go to www.picmonkey.com, a free editing software. Choose “Design” from the options.
 Step 2. From the left sidebar, select the font icon (the letters).
 Step 3. From the fonts, scroll down and choose the one you like (I chose Quicksand) and then click “Add Text”.
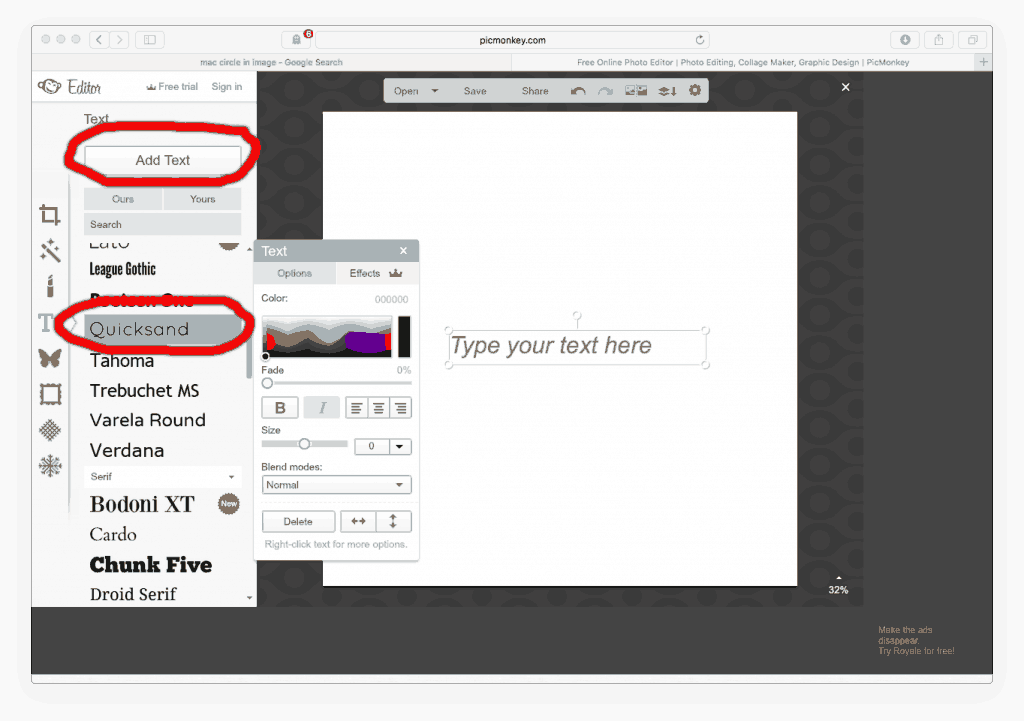 Step 4. Click on the text box that appears and type in your number. Then use the frame thingy to stretch it much larger.
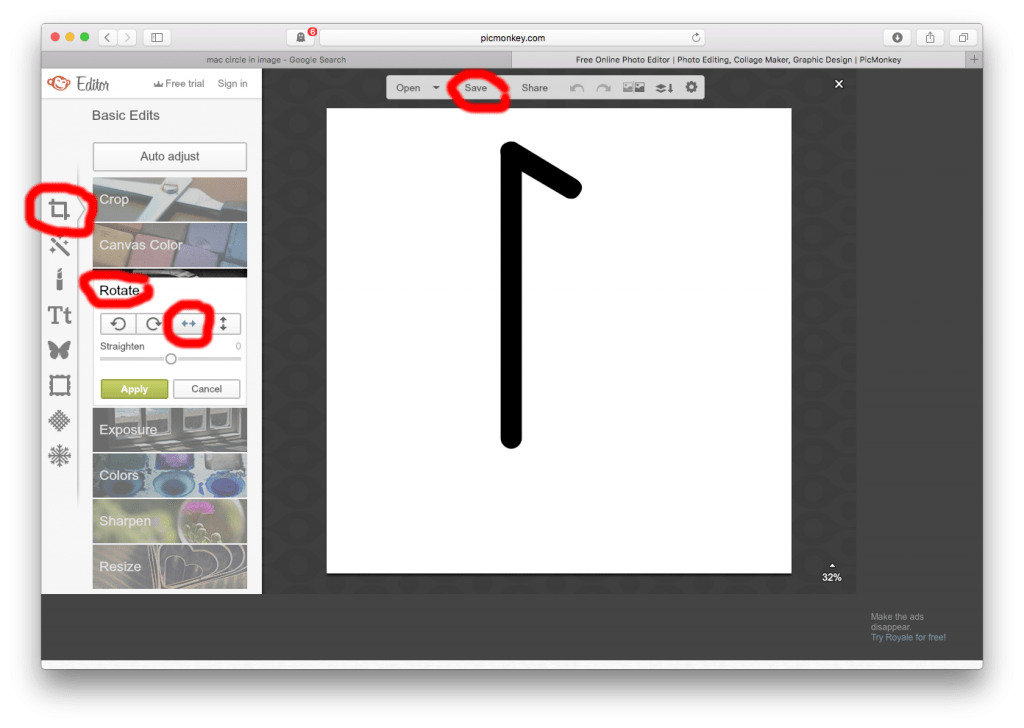
 Step 5. Go back to the left sidebar and choose “Basic Edits” (the thing that looks like an overlapping square at the top). Go to the “flip” option and flip the letter backwards. Save your picture.
 Step 6. Go to your printer and tell it to print the image onto whatever size label you have (in a pinch, you could print onto regular paper and use glue for the next step, but labels are a time saver).
Step 7. Stick your number label onto the back of the sandpaper and cut out the shape carefully.
Step 8. All you have to do now is glue your sandpaper number to your cardstock, if you’re using it, and you’re done!
How to use your Montessori-style sandpaper numbers
If you’d like some ideas for using sandpaper numbers with kids up to about 12, you can see my post 5 Ways to Use Sandpaper Numbers over at The Usual Mayhem today too!
Erin is the sleep deprived mother of three behind The Usual Mayhem blog. She homeschools, homesteads, and works at an antique store in her “spare” time. She drinks far too much coffee and is easily distracted by shiny things. Visit the blog to see the inspirations and ramblings of an addled mind.

Transform your teaching with Fun Math
The Fun Math series gives you a math curriculum that is easy to teach and highly effective.
Children love these lessons because they are engaging and fun.
You'll have a clear set of ready-made math lessons and activities that are simple to lead using our step-by-step lesson guides, and which children really understand.
Be the best math teacher and boost your children's confidence and skills with Fun Math.
See more and transform your teaching here.
