Please welcome another of our super guest writers to NurtureStore. Today Stephanie from Twodaloo is bringing us a gorgeous toddler craft idea where the process of making it is just a fabulous as the finished product: a wonderful toddler-created clay pot garden sculpture.
Toddler crafts :: garden sculpture
Hello new friends! I’m Stephanie and I blog over at Twodaloo, where I share early childhood activities that I do with my two-year-old twins, Will and Sydney. We love art, natural learning (preferably outside), and sensory play activities with a healthy dose of imaginative play and a sprinkling of whimsy, too.
Since my little ones love to be outside, we have been hard at work improving our outdoor play spaces this spring. To brighten up our gardens, I have enlisted the help of the twins to create a variety of colorful works of art, and I’m sharing one of my favorites with you today! This clay pot garden sculpture turned out beautifully, and I love that the kids were able to be involved in every step of the process.

To make this sculpture, you will need three clay pots in graduated sizes (small, medium, and large), outdoor acrylic paint (we used Patio Paint), painter’s tape, and a strong adhesive such as super glue. I found three fluted clay pots at a local garden store, set up our outdoor art table in a shady spot in our back yard, and let the twins paint the pots with a rainbow of bright colors. We had fun with this step- we used a variety of brushes to smear, dot, drip, and even fling paint onto our pots!
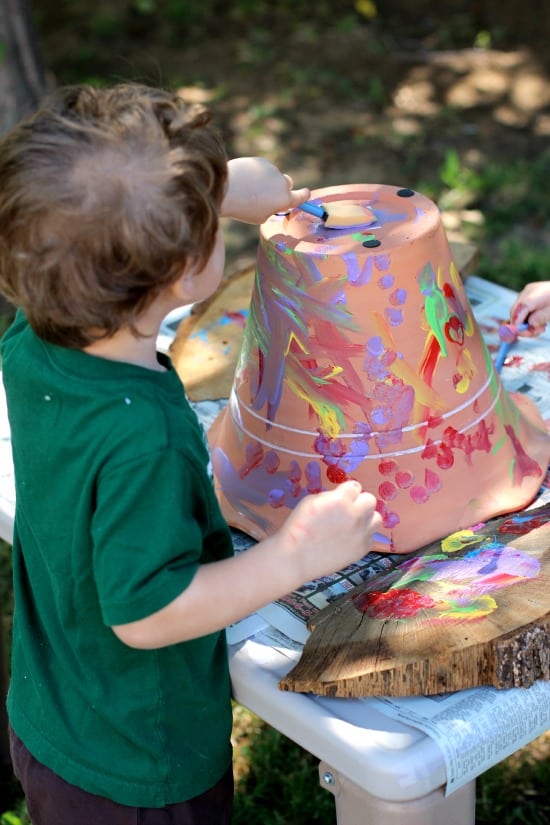
After our rainbow creations had a few hours to dry, we took our painter’s tape and made random, spiderweb-like patterns all over each pot. Tearing and sticking on the tape was great for the twins to practice fine motor and focus/concentration, and since painter’s tape is easily repositioned, I could move any pieces that got bunched up in the process without harming their original artwork. You could also use the tape to make stripes, spirals, or any other shape you desire.
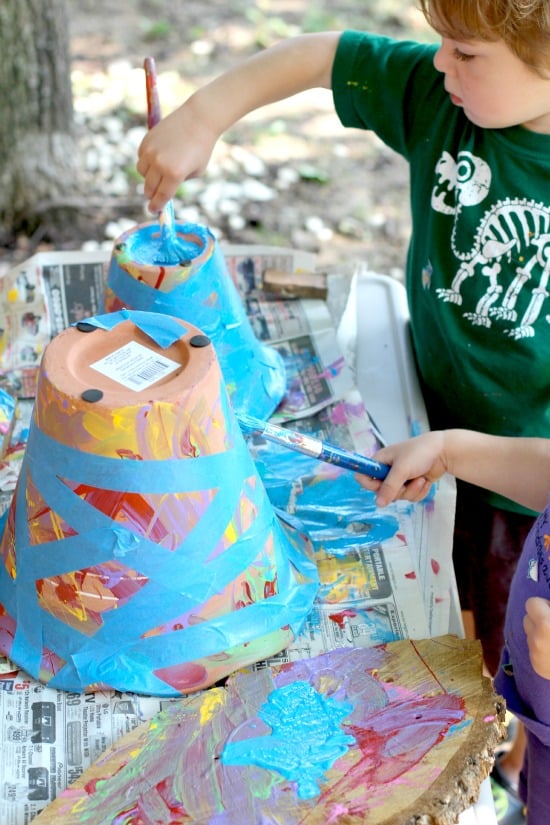
Once the tape was positioned how we wanted it, I took the pots back to our shady table and let my little ones cover each pot entirely in bright blue paint. For this step, you want to choose a bold color that pops against your original artwork. Be sure that your pots are covered thoroughly with your solid color and then allow to dry for a few minutes.

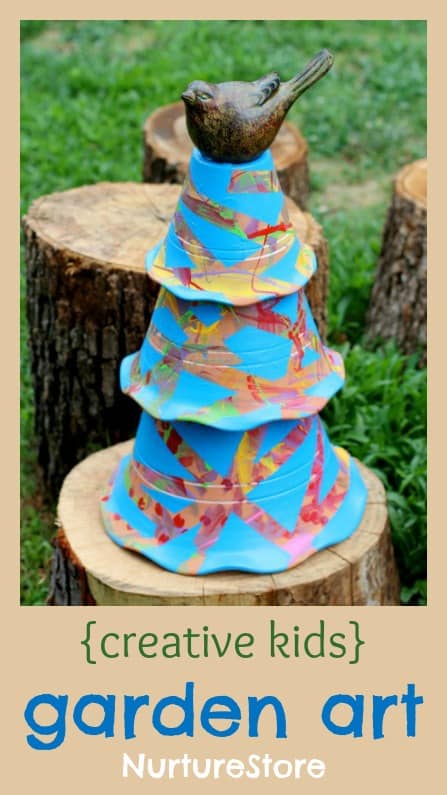
When your paint has had a few minutes to set, carefully pull off your “web” of tape to reveal strips of your original artwork underneath. Don’t wait until your paint has completely dried or you risk pulling strips of paint off with your tape. Once your pots are thoroughly dry, enjoy them as they are or stack them on top of each other like we did to create a whimsical tower. We used Gorilla Glue to secure the pots together and then added a little bird to perch on top of our sculpture. I had originally intended for this to be a deluxe fairy house, but I thought it was pretty just the way it was. What do you think?
More Toddler Art Ideas
If you are looking for more fun toddler art ideas, you can find them here. We have lots more planned for this summer and beyond, and we’d love for you to follow along!
 |
Stephanie Haass is a speech-language pathologist specializing in child language who is currently staying home to play and learn with her toddler twins. She writes about early childhood activities with a developmental slant at her blog, Twodaloo. You can also find her on Facebook, Google +, and Pinterest. |


Love, love, love this idea. We have used tape as a resist in many projects, but never in this way. Can’t wait to try it out with our kids.
Hello – Did you put on a final finish over the pots to protect the paint from washing away in the rain? Thanks!
Stephanie doesn’t mention that in her instructions, so I’m guessing she didn’t. Might be a good idea though, especially if you’d like them to last.