Have you ever tried turning your children’s art into a keepsake ragdoll? I think it’s such a special way to capture their drawings and turn them into something they can play with now, and keep as they grow older. And it’s very easy to do.
How to make a ragdoll from your child’s art
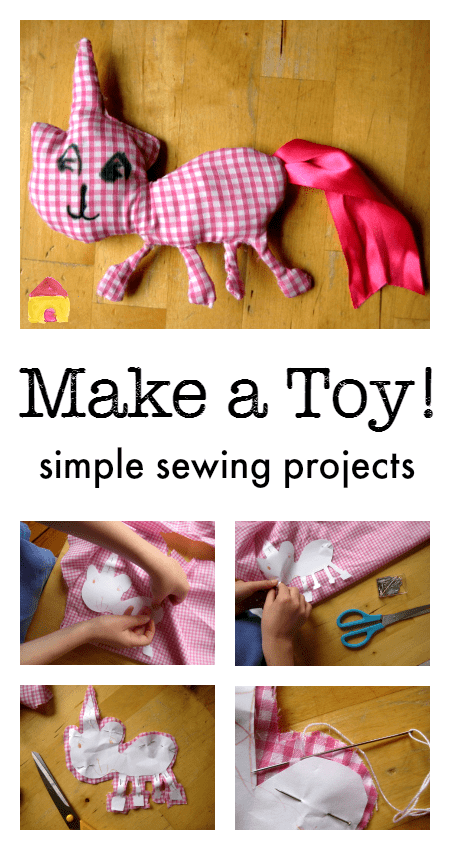
This project took us just over an hour, from start to finish, with the children involved every step of the way. None of us are great seamstresses but the more we practise, the better we get! We used supplies we had to hand and transformed my daughter’s drawing into a magical unicorn ragdoll. Here’s how you could make one:
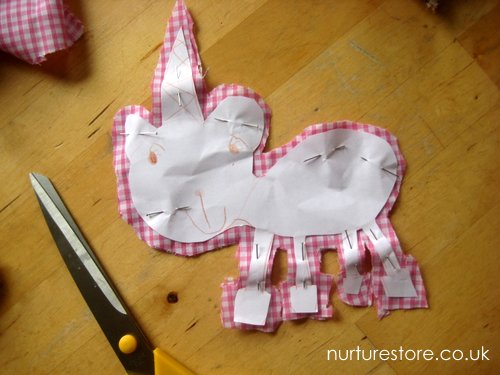
Start with some art. You could use a favourite picture or draw one especially to use to make a doll. Young children’s big and bold drawings are perfect for this, as something too intricate is much harder to transfer to being a doll. you could do a traditional doll but we made a unicorn.
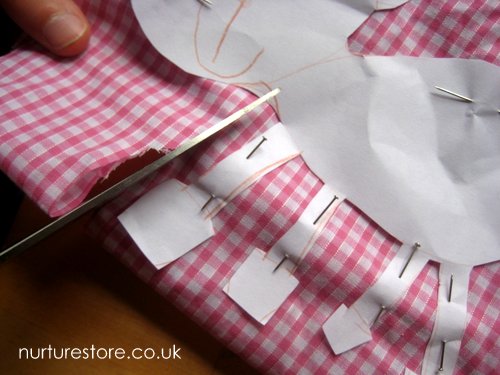
Choose some fabric and fold it in half so you’re able to cut out two matching sides at once. It’s a good idea to choose something which is washable. We used a light cotton fabric which the children found easy to cut and sew. Cut out your child’s art and pin it onto the fabric. Take care with the pins and sewing needles throughout, but if possible let your children try each stage. They’re learning great, practical activities and helping develop their fine-motor skills too.
Cut out around your picture, leaving a border right around your picture, which will give you a seam allowance when you sew the ragdoll together. Using a pair of dressmakers scissors is best, to cut carefully and cleanly through the fabric.
Then you’re ready to sew your ragdoll together. Depending on the child they might like to do a little, a lot or all of the sewing. My six-year-old had a try at a few stitches and I did the rest, and my nine-year-old managed all her sewing by herself.
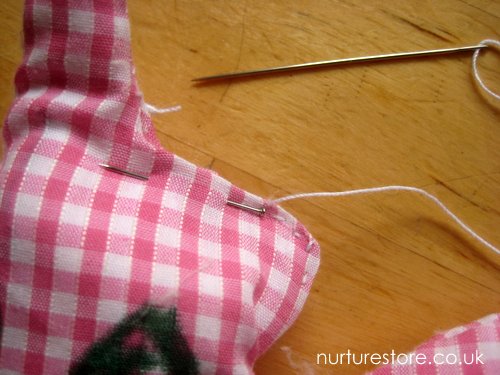
We used a simple running stitch. The stitches do need to be fairly small and close together so that the stuffing doesn’t all come out, but you don’t need to be too neat. I think there is a lot of charm in imperfect first attempts. Sew around the edges of your shape, stopping a little before you complete the circuit so you can get the stuffing inside.
For a neater finish, you need to turn your ragdoll inside out, so the stitches and seam are on the inside. This can be quite fiddly, depending on your design – unicorn hooves are tricky! – and B always chooses to leave this stage out and simply have the raw edges showing. L wanted her unicorn ragdoll to be all neat and tidy though.
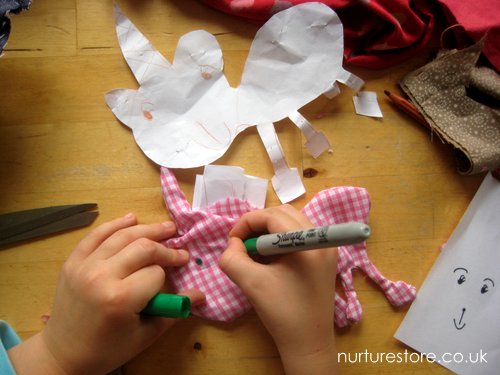
Then the easiest way for children to give their ragdoll toy a face, or any other markings, is by drawing on the fabric with a permanent marker or a fabric pen. Pop a piece of paper inside the fabric before your draw to make sure no marks transfer through to the other side for the ragdoll. You could stitch on buttons or embroider a face but by this stage we were eager to finish and get playing, and using a permanent marker meant my six-year-old could be more in charge of making her own ragdoll.
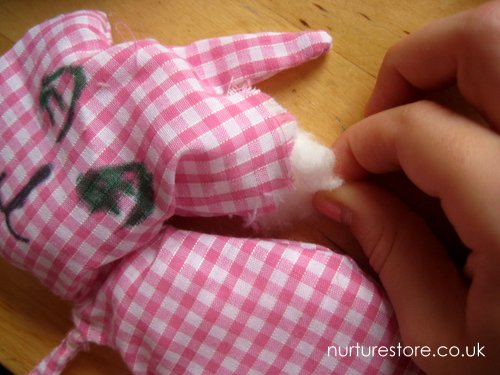
Then push some stuffing inside your ragdoll. The girls chose to use cotton wool but it could be a better idea to use something which is washable.
Finish the sewing to close up the final gap.
We stitched on a ribbon for a tail and ta-daa! Meet our art ragdoll unicorn, Magic Sparkle.






Cathy this is so adorable. I love this idea. I’m featuring this post on my blog today as one of my favourites from last week’s Kids’ Co-op Link Up.
This is so awesome! I plan on doing this over the weekend 🙂 What kind of thread did you use to sew up the doll? It looks thicker than sewing thread. Would embroidery thread work (6 strands) or would you recommend something like yarn?
Hi Cyndi. We used an embroidery thread which we found easier for the children to handle. Yarn might be even better for younger children but I guess it depends what fabric you are using though – yarn might be too thick? I’d love to see what you make.
If you could see this smile on my face, you’d know that you put it there! I’m all about creating memories and I thank you sooooo much!
Thank you for you lovely comment Beverly!
You know what I’ve seen around lately that I’m going to try this summer in our art camp, is using embroidery thread for them to draw and then transfer their drawing onto a piece of material and then have them embroider it
Hi Faigie. We have done that too, with a simple pencil drawing, and it is one of my favourite keepsakes. You can see ours here https://cathyjames.org/embroidery-for-children
Great way to do it Anna. I’d love to see your post if you do blog it.