
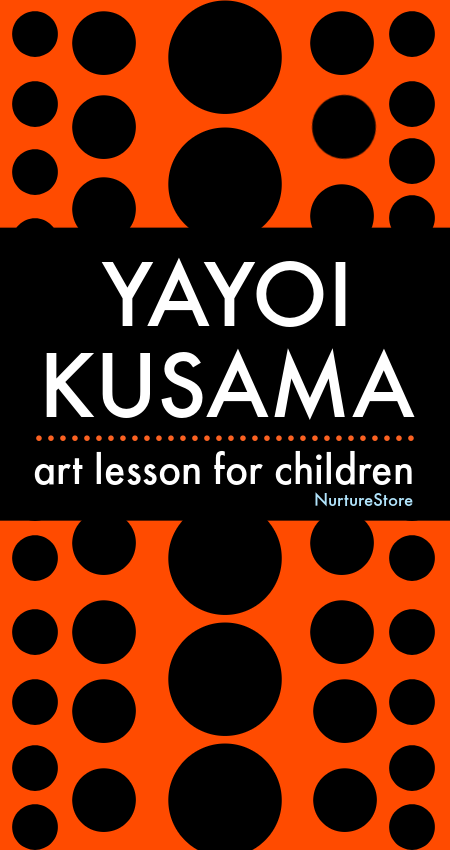
In this Yayoi Kusama art lesson for children you can learn about this famous Japanese artist and create art inspired by her famous dots.
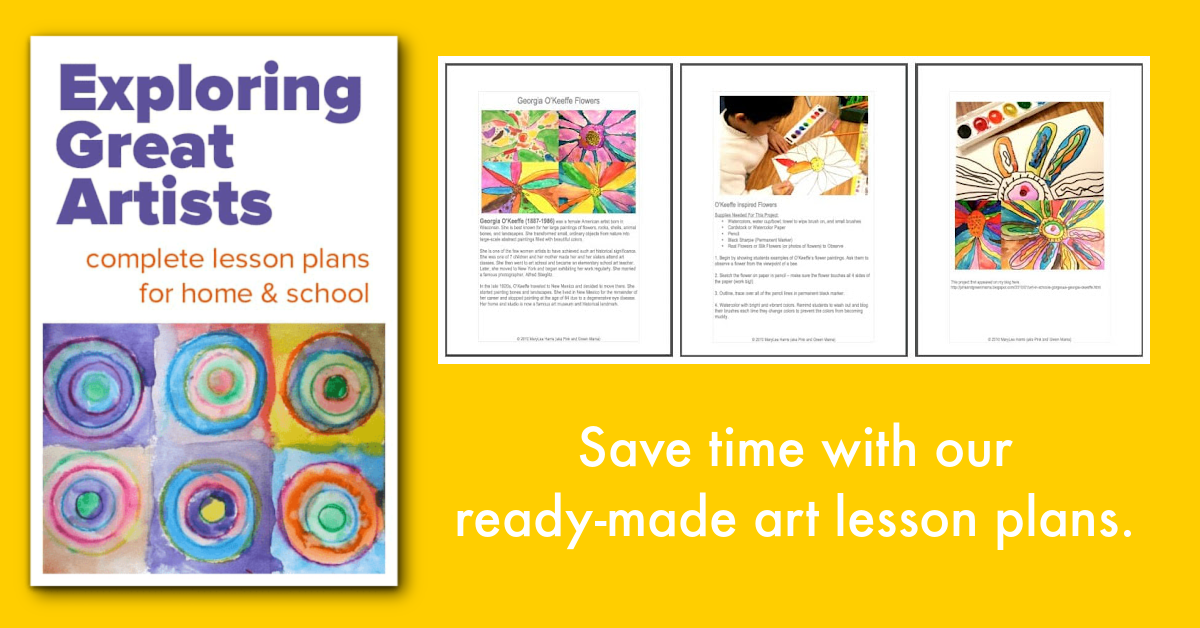
Save time with our ready-made art lesson plans
The best and easiest way to teach great art lessons is to use our ready-made art curriculum, Exploring Great Artists.
This ready-made art curriculum gives you everything you need to teach an exciting art program inspired by the great artists of the world including:
- a complete program of art lessons featuring famous artists from around the world including Miro, Picasso, O’Keefe, Van Gogh, Matisse, Pollock, Monet, Warhol, Mondrian, Kandinsky and many more
- an art history profile of each artist
- creative, hands-on art projects for your children to try, for every featured artist
- materials lists and step-by-step lesson plans that make it so easy to teach
- full colour photographs of real student art work for each project
- everything planned for you, so you can enjoy it as much as your children do
See more and get your copy of Exploring Great Artisits here and you’ll be all set to teach this great curriculum.
Yayoi Kusama art lesson for children
The Japanese artist Yayoi Kusama is famous for her abstract art featuring bright colours and many, many black dots. Let’s learn about why she started making these patterns everywhere, see examples of her art, and create dotty pictures inspired by her.
This project is part of our art lessons about famous artists.
In this article you can:
:: learn about the famous artist Yayoi Kusama
:: see examples of her work
:: learn about contrasting colours and repeating patterns
:: explore printing using different sizes of stamps
:: find links to more famous art lessons
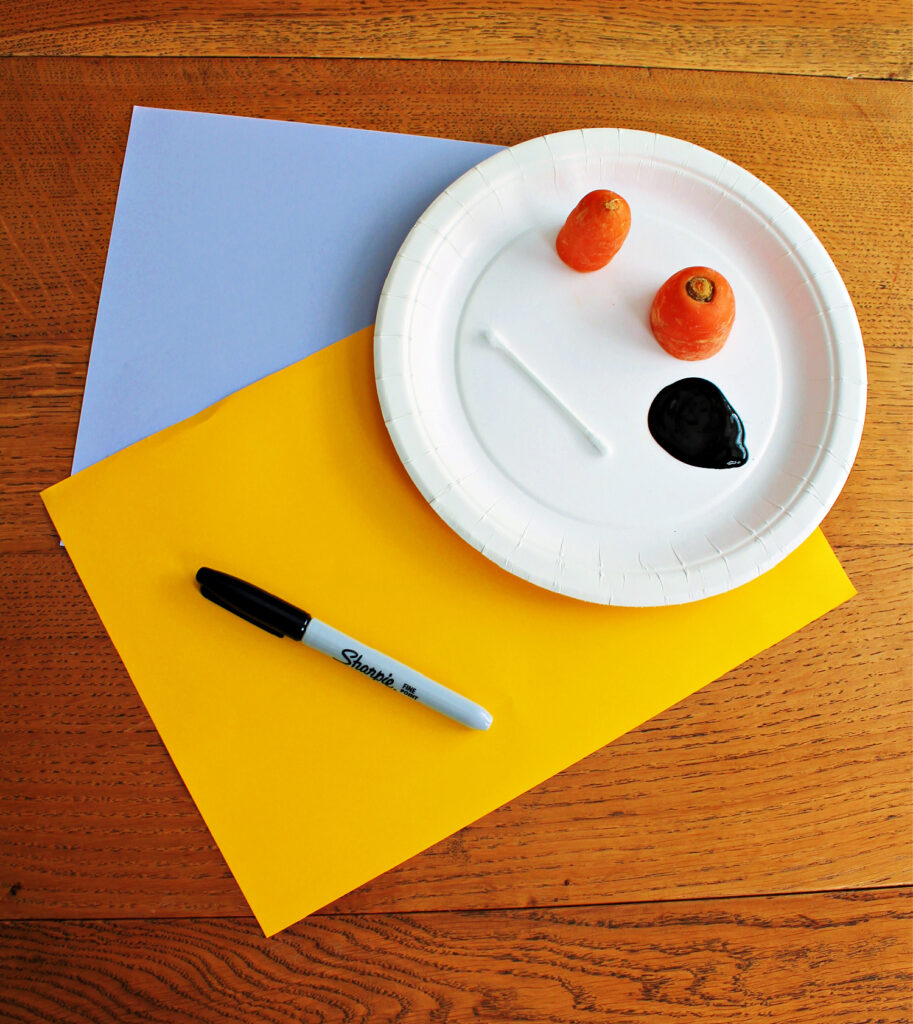
Materials needed
:: brightly coloured card in two contrasting colours
:: black marker pen
:: scissors
:: black paint / stamp pad
:: three stamps in increasing sizes (the eraser end of a pencil, your finger and a wine bottle cork are ideal)
:: glue
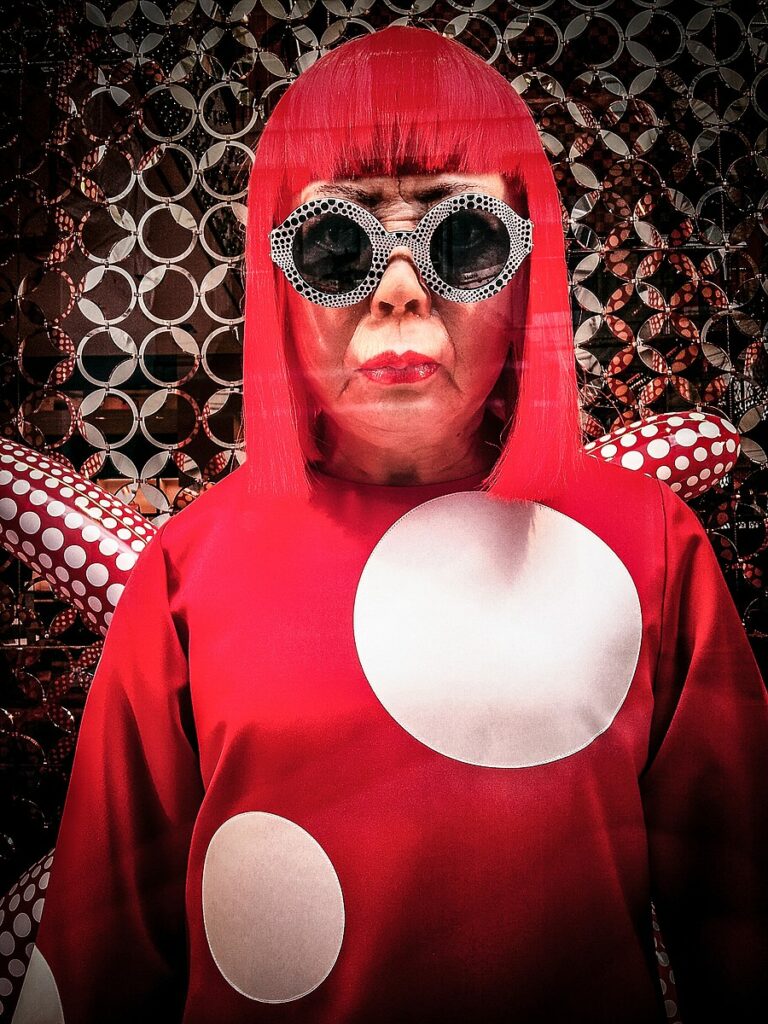
Meet famous artist Yoyoi Kusama
Yayoi Kusama is a Japanese artist. She was born in Matsumoto, Nagano in 1929 but moved to live in the United States of America when she was 27 years old. She is famous for her paintings, sculptures, and installations which all feature lots of dots.

When she was a child she had a hallucination – a sensory experience that seemed real but was created by her mind. She saw a field of flowers where all flower heads turned into dots and started talking to her. She felt she could disappear into the field of flowers, or as she describes it ‘self-obliterate’, and become part of the bigger universe.
When she feels exhausted or anxious she has said that creating art with repeating patterns of dots helps her feel calmer and connected to everyone else on the planet and in the universe. It gives her a feeling of wellbeing.
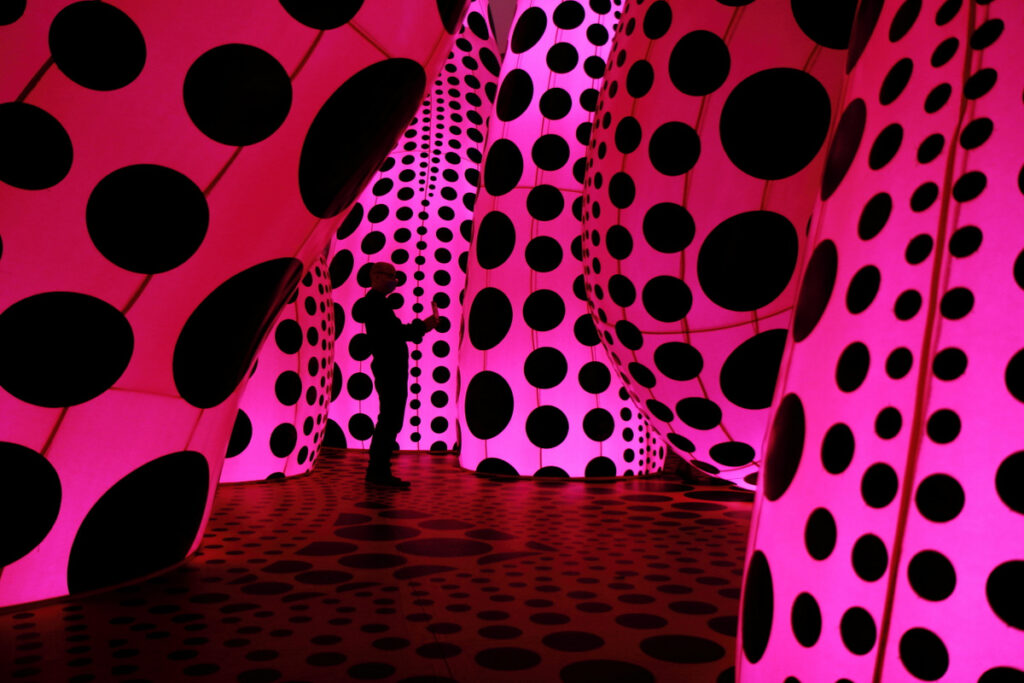
Some of her famous artworks are rooms, filled with bright colours and black dots on every surface, that you can walk through. Can you imagine how you might feel in a space like this?
You can watch the video below made by the Tate Gallery to find out more about how Yayoi Kusama became an artist.
Examples of Yayoi Kusama’s art
Take a look at these examples of Yayoi Kusama’s art. As you look at them, answer these questions:
:: What can you see?
:: What shapes and patterns can you see?
:: What colours can you see?
:: What does the artwork make you think of?
Orchard Road 3, Singapore Biennale 2006
Pumpkin, exhibition for HAM art company, 2016
The Spirits of the Pumpkins Descended into the Heavens, 2019
Yayoi Kusama Exhibition Israel, 2022
Infinity Mirrored Room—My Heart is Dancing into the Universe, 2023

How to make art in Yayoi Kusama style
Our art project inspired by Yayoi Kusama will be using three key elements of her style:
:: repeating patterns of dots
:: dots in three sizes: small, medium and large
:: black dots on a bright background
Yayoi Kusama pumpkin art project for children
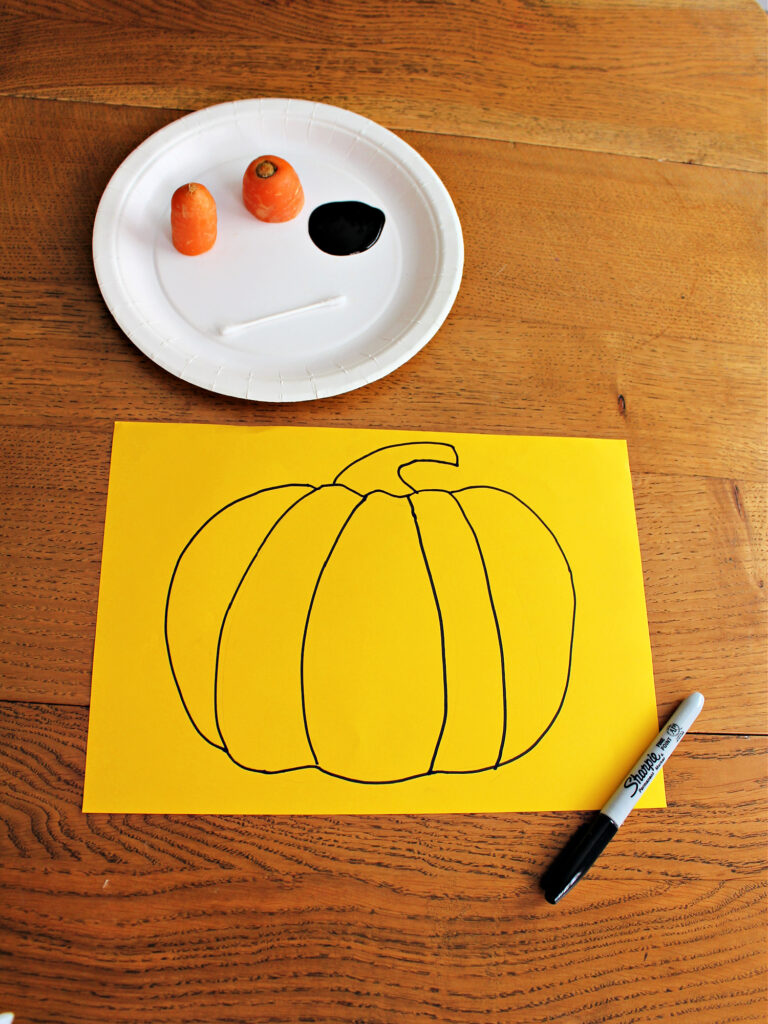
Choose two pieces of card in contrasting colours. You could choose red and green, blue and orange, or yellow and purple. (See our colour theory lesson for more explanation of contrasting colours).
On one of the pieces of card use a black marker pen to draw the simple outline of a pumpkin, including lines down the pumpkin to show its bumpy shape.
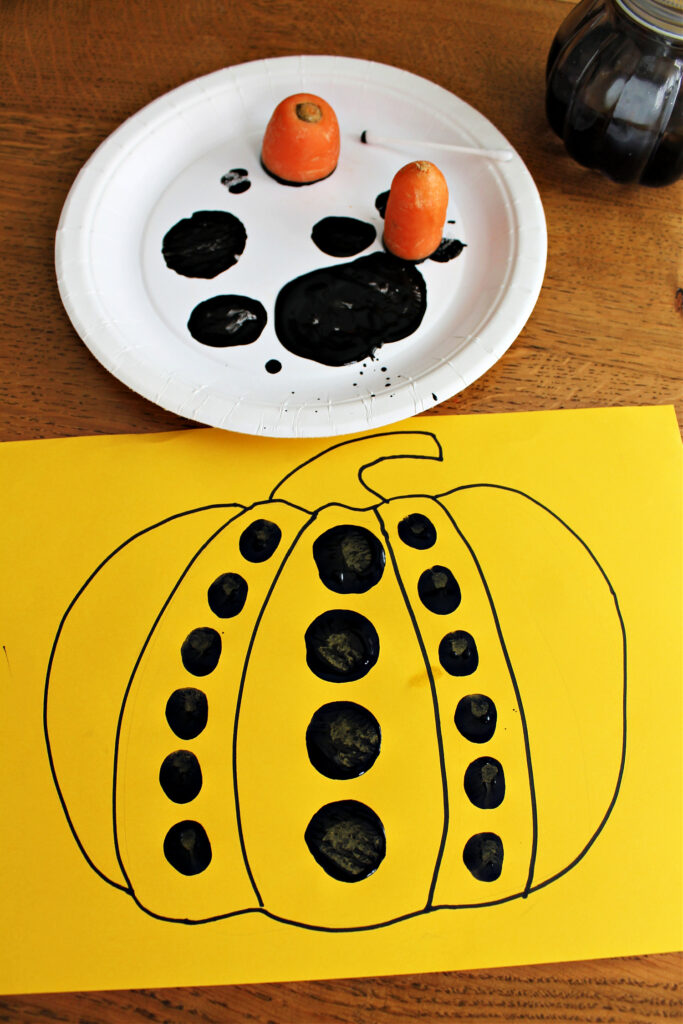
Then use your stamps to print black circles in lines down the pumpkin. Start with the biggest circle stamp (a wine bottle cork for example). Dip it in black paint, or press it on the black ink stamp pad, and then press it onto your pumpkin. Print lots of circles this size in lines down the pumpkin.
Then use your medium sized stamp (your finger) to print more lines down your pumpkin.
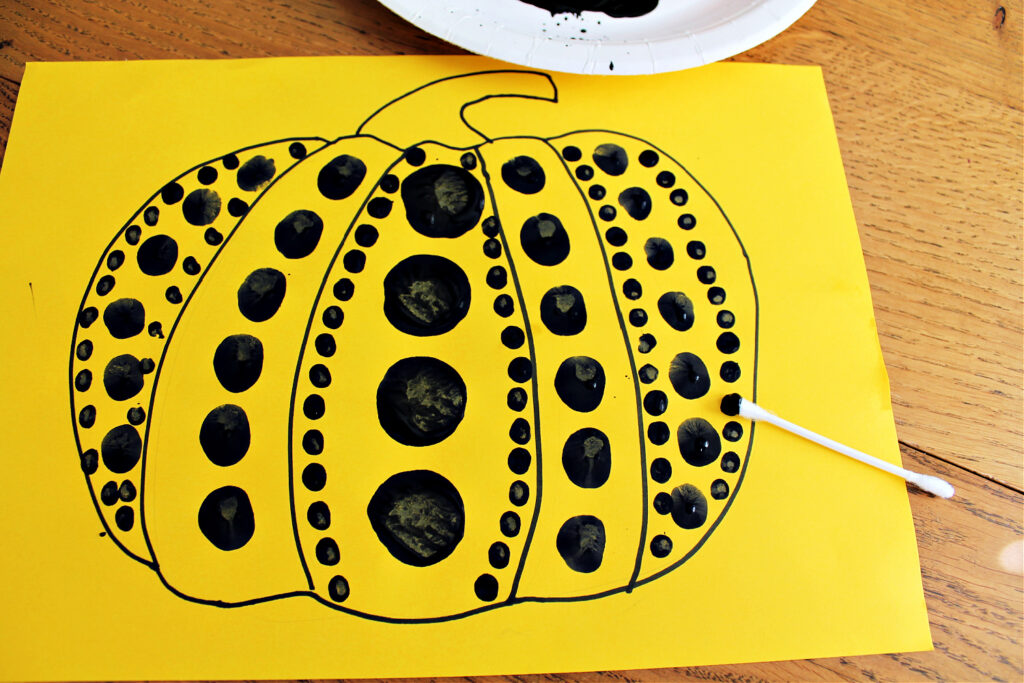
And then use the small sized stamp (the eraser end of a pencil) to make the final lines of dots down your pumpkin.
Once the paint is dry, use scissors to cut out your dotty pumpkin.
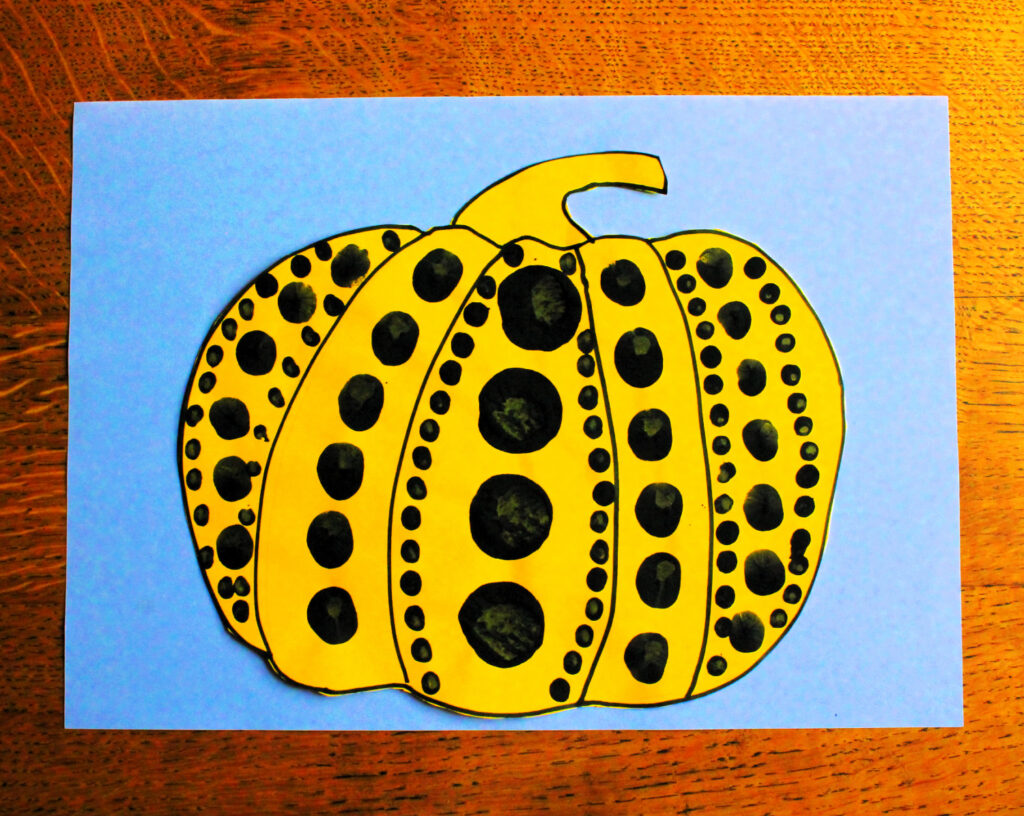
Place the pumpkin of the second piece of card (in the contrasting colour) and glue it in place.
By using contrasting colours of card, the colours of each looks more intense, and therefore makes your pumpkin ‘pop’.
Save time with our ready-made art lesson plans
The best and easiest way to teach great art lessons is to use our ready-made art curriculum, Exploring Great Artists.
This ready-made art curriculum gives you everything you need to teach an exciting art program inspired by the great artists of the world including:
- a complete program of art lessons featuring famous artists from around the world including Miro, Picasso, O’Keefe, Van Gogh, Matisse, Pollock, Monet, Warhol, Mondrian, Kandinsky and many more
- an art history profile of each artist
- creative, hands-on art projects for your children to try, for every featured artist
- materials lists and step-by-step lesson plans that make it so easy to teach
- full colour photographs of real student art work for each project
- everything planned for you, so you can enjoy it as much as your children do
See more and get your copy of Exploring Great Artisits here and you’ll be all set to teach this great curriculum.