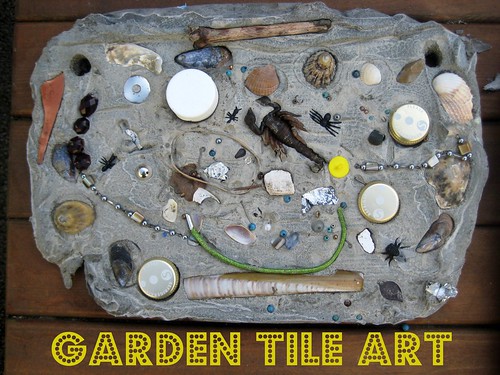
Our school gardening club has been focusing on art projects in January and February while we wait for some warmer weather to begin our planting. Our gardening club mission, as well as growing all sorts of fruit and veg, is to make the space as eco friendly as possible and a feast for all the senses.
This garden tile project used lots of recycled and found materials and created art which is a treat for the eyes and also the hands. It introduced the children (and us) to a new technique and a new material, and created a permanent outside art gallery for us to enjoy all year round. Here’s how we made our garden tile art.
Recycled garden tile art
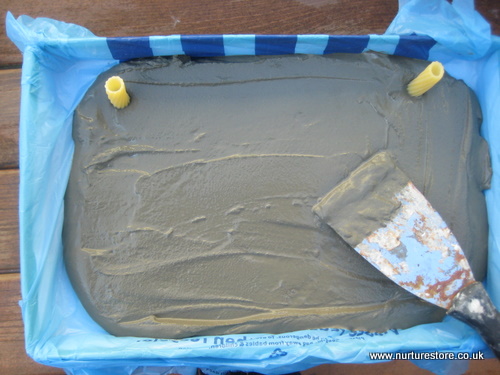
We knew we wanted to make some tiles that the children could press all sorts of art materials into to create an eco collage, and that we wanted the art to be displayed outside in the garden where it was made. We thought about using air drying clay or salt dough but knew they wouldn’t stand up to being outside in all weathers. We also considered clay we could fire but realised the materials the children were adding to their collages would get damaged in the process. So we settled on cement, which was easy to mix, held all the materials perfectly and could stay outside come rain or shine.
To make the cement tiles
:: use an old shoe box lid as a mould (kindly donated by our local Clarks store)
:: line with an old plastic bag
:: mix up the cement according to its instructions, to a fairly thick consistency
:: fill the shoe box lids and smooth down the surface
:: insert pasta tubes (genius!) to create holes so you can hang the tiles in a gallery when you’re finished. We left the pasta in place for about two hours and then gently pulled them out to create the hanging holes
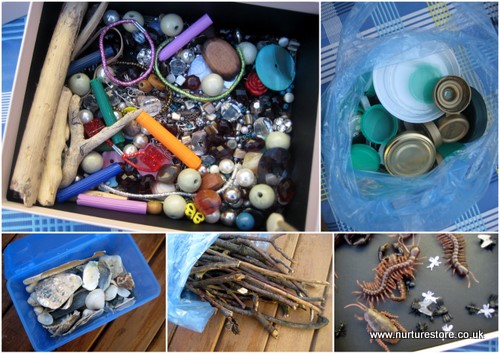
We provided the children a selection of materials, all found items, natural materials or recycled items (except for the bugs which were our one new purchase from Poundland and which seemed perfect for our garden art.) You could use:
driftwood :: twigs :: shells :: slate :: beads from broken necklaces :: buttons :: bottle tops :: pen lids :: smooth glass :: feathers
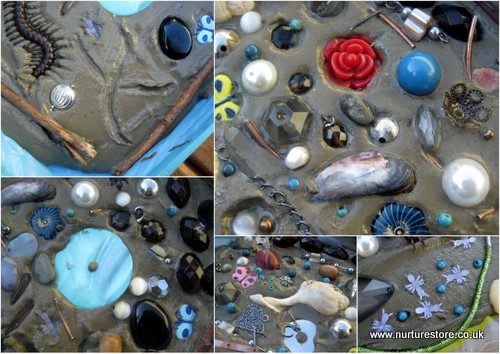
We showed the children some tile designs which I’d collated on my Kids Garden Pinterest board but then left it to them to free style and compose their own garden tile art. They really enjoyed the process of selecting their treasures and pressing the objects into the cement. They also used twigs to write words and make marks, creating patterns and animal tracks in the tiles.
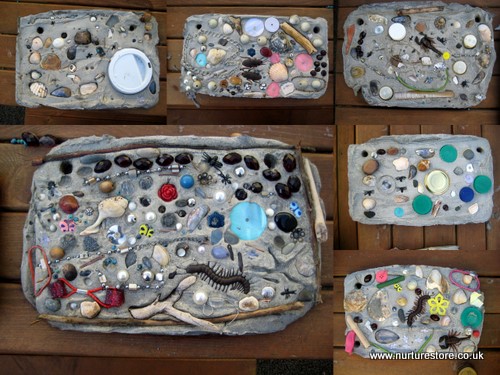
Once the designs were completed we left the tiles exactly where they were to dry out and set – best not to move them at all if you can avoid it, so the integrity of the cement isn’t affected. The tiles were beginning to set after a couple of hours, when we removed the pasta pieces, and we left the tiles in the shoe box lids for a couple of days until they were completely hard and dry. The tiles then popped out of the plastic bag linings very easily. We will add garden twine through the holes and hang the tiles in the garden to create a garden tile gallery.
Love nature arts and crafts? Download these printables!
Nature Arts and Crafts brings you over 30 wonderful printables that you can use with your children to make, create, and learn outdoors. It’s perfect for nature study, forest school activities and family days outdoors.


These are just wonderful! Love them!
I love this idea – I’ve seen something similar done with Guneria leaves on pinterest and thinking of doing both ideas as stepping stone in the kids area of the garden.
We will be pinning this idea for the spring. Thanks so much for the inspiration!
there are awesome. i have been thinking about making a little play rockery, i could use some of these
Ooh what fun! Will you be displaying these in the garden? I bet they look fabulous.
Thank you for sharing on Kids Get Crafty!
Maggy
great idea, have pinned for when daughter older and our garden is redone
thanks
Gorgeous! So many design options. Pinned.
Thanks for pinning Chris.
These are classic and fabulous! (Except for the ones with scorpions, I have a phobia.) Love them, and such a great tutorial!
Oh Michelle L, did you spot the maggots? I really wanted to throw them away before the kids even got to use them! Eew.
Beautiful! I love concrete, and making collages like this is great!
Oh, love this one! Thanks so much for sharing on craft Schooling Sunday!
Fantastic! I definitely want to make some of these for our garden at home! What a lovely way to make your mark! I imagine they’d also be nice with leaves and feathers pressed into them and removed, to just leave an imprint. Thx so much for sharing at the Outdoor Play Party!
Another corker, this will make the garden so much more child friendly and attractive for The Boy. I think we might do it for momentoes from special trips away too? I’m seeing a beach one, etc.
Yes TheBoyandMe, we are heading to the beach in the summer holiday and I’m planning on beachcombing for treasure we can use to make one of these.
So pretty! We have a big bag of cement just using up space in our garage. Now, I know what we can use it for! Thanks for linking up at The Outdoor Play Party!
This is great. Our church would love this project! The kids could make one to take home but then also make some to leave at our garden at church!
Thanks so much for sharing this on the outdoor play link up!
A great idea thankyou so much this would make a great gift for people as well, especially those who love gardening 🙂