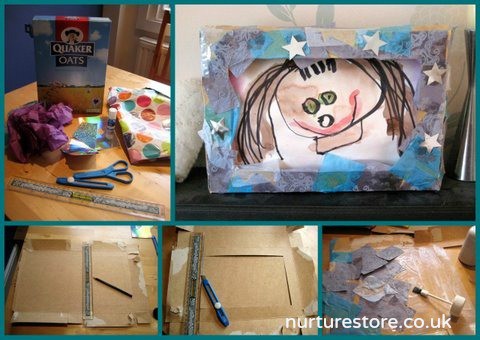
I’m always looking for ways to display children’s art. This week we decided to turn a cereal box into a 3-D picture frame to display our favourite pictures and also to be a treasure box to store an archive of our favourites.
I love to see the development of children’s drawings over time and I think it shows how they’re changing in their passions and what they observe about the world. The depth of this frame means lots of pictures can be slotted in front of oneanother so you can vary the display and file away the older pictures behind. And it’s all made by re-purposing the goodies in your making box.
Make a 3-D picture frame
1. Take a cereal box and carefully open it out flat.
2. On the inside of the box, on one of the larger panels, use a ruler and pencil to draw out a rectangle. This will be where your picture shows through so leave a border wide enough to make a suitable frame.
3. Cut out the rectangle using a ruler and craft knife. Take care!
4. Now decorate all over the inside of your box. We used glue to stick on tissue paper, wrapping paper and silver star cutouts. Some pages from your favourite comic would be good too.
5. Once it’s all dry, re-fold your box with your design on the outside and fasten it up using glue or sticky tape. Leave one end open so you can insert your art works. We cut off the flaps at the open end to make it look neater when on display but you might like to leave them on so you can fasten up your frame and keep it as a treasure box when it’s full.
6. Adding a small blob of bluetac (or play dough) inside the bottom of the frame helps to stabilise it, so it doesn’t wobble over – and you can move the bluetac to the other side if you want to vary your frame between a portrait or landscape format.
7. Then fill with your favourite pictures and stand back and admire your masterpiece.


